Have you ever ever struggled with establishing e-mail integration in your Django initiatives? Whether or not it’s configuring SMTP settings, dealing with safety considerations, or automating contact kinds, e-mail performance is essential for person engagement and belief.
On this tutorial, we’ll stroll by learn how to ship emails utilizing Django with sensible, step-by-step directions. We’ll cowl learn how to configure Django SMTP connections, learn how to arrange an password in your e-mail supplier, and learn how to ship emails by the Django shell. We’ll additionally have a look at learn how to arrange a contact type in your Django app, which can enable your clients to contact you.
Key Takeaways
- Configure SMTP Settings: Arrange Django e-mail ship by configuring the settings.py file with the suitable e-mail backend, host, port, and safety settings (e.g., TLS).
- Safe Credentials with Django Environ: Use Django Environ to handle delicate credentials like EMAIL_HOST_USER and EMAIL_HOST_PASSWORD securely through surroundings variables, stopping hardcoding of credentials within the supply code.
- Generate App-Particular Passwords: When utilizing Gmail, allow 2-Step Verification and create an App Password to securely authenticate Django mail sending as an alternative of relying in your main password.
- Ship Emails with send_mail: Use Django’s built-in send_mail perform to ship emails with Django from the Django shell, views, or reusable helper features, using settings for streamlined configuration.
- Implement Automated Contact Types: Construct an automatic contact type utilizing Django Types and combine email-sending performance for seamless dealing with of person inquiries.
- Check E mail Performance: Confirm email-sending logic with unit exams and use instruments like MailHog or Console E mail Backend for protected growth testing.
- Observe Greatest Practices: Guarantee safe and environment friendly e-mail supply through the use of TLS encryption, correct authentication, and modular e-mail features for reusability.
Most net purposes use e-mail to handle essential operations, reminiscent of resetting passwords, account activation, receiving buyer suggestions, sending newsletters, and advertising campaigns. Whereas Gmail works for testing or small initiatives, manufacturing web sites ought to use devoted e-mail companies reminiscent of AWS SES, SendGrid, or Mailgun.
Nevertheless, if you happen to evaluate the price and the hassle of utilizing a devoted e-mail service, sending emails along with your private e-mail might be extra affordable for small or testing initiatives. So we’ll take that strategy right here to maintain issues easy.
Notice: It’s not a good suggestion to make use of your private e-mail service in your manufacturing web site. You’ll be able to be taught extra about Gmail sending restrictions, or check with the restrictions of your e-mail supplier.
Notice: the total code for this tutorial is on the market on GitHub.
Understanding the SMTP Server and Easy Mail Switch Protocol
SMTP (or the Easy Mail Switch Protocol) is a algorithm for figuring out how emails are transferred from senders to recipients. SMTP servers use this protocol to ship and relay outgoing emails. (Notice that different protocols govern how emails are acquired.)
An SMTP server all the time has a novel handle and a selected port for sending messages, which typically is 587. We’ll see how the port is related in Django e-mail ship.
For this instance, we’ll use Gmail’s SMTP server, the place:
Now, let’s see how we are able to ship e-mail with Django.
Making a Django Venture
Each Django undertaking ought to have a digital surroundings, as we don’t wish to mess up the undertaking dependencies. To create one, run the next:
Notice: if you happen to’re unfamiliar with digital environments, be sure to examine our Python digital environments information.
The command above creates a digital surroundings with the title .venv. To activate this digital surroundings, you need to use the next:
.venvScriptsactivate


.venvScriptsActivate.ps1


supply .venv/bin/activate
Since Django is a third-party bundle, it’s a must to set up it with pip:
It will set up the newest model of Django, which you’ll be able to examine with pip freeze.
To create a Django undertaking, you name the command line utility django-admin:
django-admin startproject EmailProjectWith the command above, you’re making a Django undertaking with the title EmailProject, however you’ll be able to create the undertaking with no matter title you need. Now, enter to the undertaking listing and run the server:
cd EmailProject
python handle.py runserver
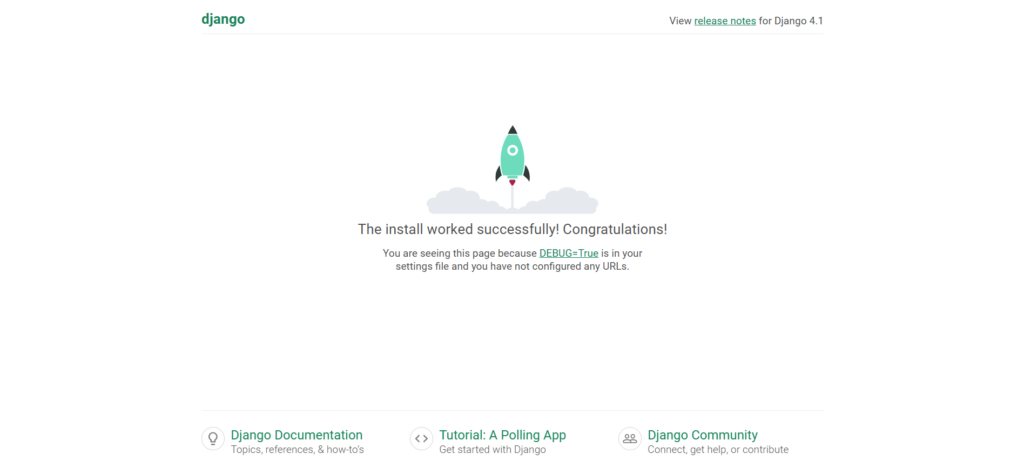
After working the Django server, go to http://localhost:8000 in your browser. You’ll see an auto-generated web page with the newest Django launch notes.
Configuring Django E mail Backend for SMTP
The e-mail backend is the mechanism to ship emails with Django. By default, Django makes use of django.core.mail.backends.smtp.EmailBackend, which permits it to hook up with an SMTP server and ship emails. Relying on the surroundings (growth or manufacturing), you’ll be able to select a unique e-mail backend to fit your wants.
You’ll want to change the settings file earlier than sending emails, so let’s find that file with the beneath command:
Notice: for simplicity’s sake, we’ll be utilizing solely UNIX (macOS or Linux) system instructions.
The tree command outputs the file construction of a listing. On this case, since we’re not giving it a selected listing path, we’ll get one thing just like the next if we’re within the root folder of the undertaking:
├── EmailProject
│   ├── asgi.py
│   ├── __init__.py
│   ├── settings.py
│   ├── urls.py
│   └── wsgi.py
└── handle.py

1 listing, 6 recordsdata
The file we’ll be continually modifying by this tutorial is the settings.py contained in the EmailProject folder. It holds all of the undertaking configuration you’ll want, and means that you can set customized variables. Because the Django docs say, “A settings file is only a Python module with module-level variables”.
Let’s have a look at the settings required for sending an e-mail with Django. Open the EmailProject/settings.py file and paste the next settings on the backside of the file:
EMAIL_BACKEND = 'django.core.mail.backends.smtp.EmailBackend'
EMAIL_HOST = ''
EMAIL_PORT = 587
EMAIL_USE_TLS = True
EMAIL_HOST_USER = ''
EMAIL_HOST_PASSWORD = ''
Let’s break down the code above by analyzing every one in all these settings.
E mail Backend
The EMAIL_BACKEND setting declares the backend our Django undertaking will use to attach with the SMTP server.
This variable is pointing to the smtp.EmailBackend class that receives all of the parameters wanted to ship an e-mail. I strongly recommend you check out the category constructor instantly on the Django supply code. You’ll be shocked by how readable this code is.
Notice: though this class is the default EMAIL_BACKEND, it’s thought of a great observe to be specific within the Django settings.
All the opposite e-mail settings will probably be based mostly on the constructor of this EmailBackend class.
E mail host
The EMAIL_HOST setting refers back to the SMTP server area you’ll be utilizing. This depends upon your e-mail supplier. Under is a desk with the SMTP server host corresponding to a few widespread suppliers:
| E mail supplier | SMTP server host |
|---|---|
| Gmail | smtp.gmail.com |
| Outlook/Hotmail | smtp-mail.outlook.com |
| Yahoo | smtp.mail.yahoo.com |
We’re leaving this setting clean for now since we’ll use a .env file later to keep away from hard-coded delicate keys or per-site configurations. You need to by no means set credentials instantly into the code. We’ll be utilizing Django Environ to unravel this downside.
E mail Port
The EMAIL_PORT setting should be set to 587 as a result of it’s the default port for many SMTP servers. This stays true for private e-mail suppliers. This port is used together with TLS encryption to make sure the safety of e-mail sending.
E mail Use TLS
Transport Layer Safety (TLS) is a safety protocol used throughout the Internet to encrypt the communication between net apps (Django) and servers (SMTP server).
Initially, we set the EMAIL_USE_TLS variable to True. This implies Django will use Transport Layer Safety to hook up with the SMTP server and ship emails. (It’s necessary for private e-mail suppliers.)
E mail Host Person
The EMAIL_HOST_USER setting is your private e-mail handle. Depart it clean for now, since we’ll use django-environ to arrange all of those credentials.
E mail Host Password
The EMAIL_HOST_PASSWORD setting is the app password you’ll get out of your e-mail account — the method we’ll be doing proper after this part. Similar story: go away this setting clean, as we’ll use environmental variables later.
For different suppliers, you’ll be able to modify the settings accordingly. For instance:
Outlook Configuration:
EMAIL_HOST = 'smtp-mail.outlook.com'
EMAIL_PORT = 587
EMAIL_USE_TLS = True
EMAIL_HOST_USER = 'your-email@outlook.com'
EMAIL_HOST_PASSWORD = 'your-app-password'
Yahoo Configuration:
EMAIL_HOST = 'smtp.mail.yahoo.com'
EMAIL_PORT = 587
EMAIL_USE_TLS = True
EMAIL_HOST_USER = 'your-email@yahoo.com'
EMAIL_HOST_PASSWORD = 'your-app-password'
Setting Up Gmail SMTP Server with App Password
Since “Much less Safe Apps” is deprecated by Google, the right and safe approach to hook up with Gmail account for sending emails is to make use of App Passwords. App Passwords can be found provided that you allow 2-Step Verification in your Google account.
Why Use App Passwords?
- Safe Different: As an alternative of sharing your main password, App Passwords present restricted entry for particular purposes.
- Works with SMTP: App Passwords adjust to Gmail’s safety necessities for SMTP entry.
- Obligatory for 2-Step Verification: As soon as 2-Step Verification is enabled, App Passwords are the one technique to enable exterior apps to attach.
Step 1: Allow 2-Step Verification
- Go to your Google Account: https://myaccount.google.com/.
- Navigate to Safety within the left-hand menu.
- Scroll to the “The way you register to Google” part.
- Click on on “2-Step Verification” and comply with the on-screen directions:
- Use your telephone quantity or an authenticator app to arrange 2-Step Verification.
- Confirm your setup with the code despatched to your gadget.

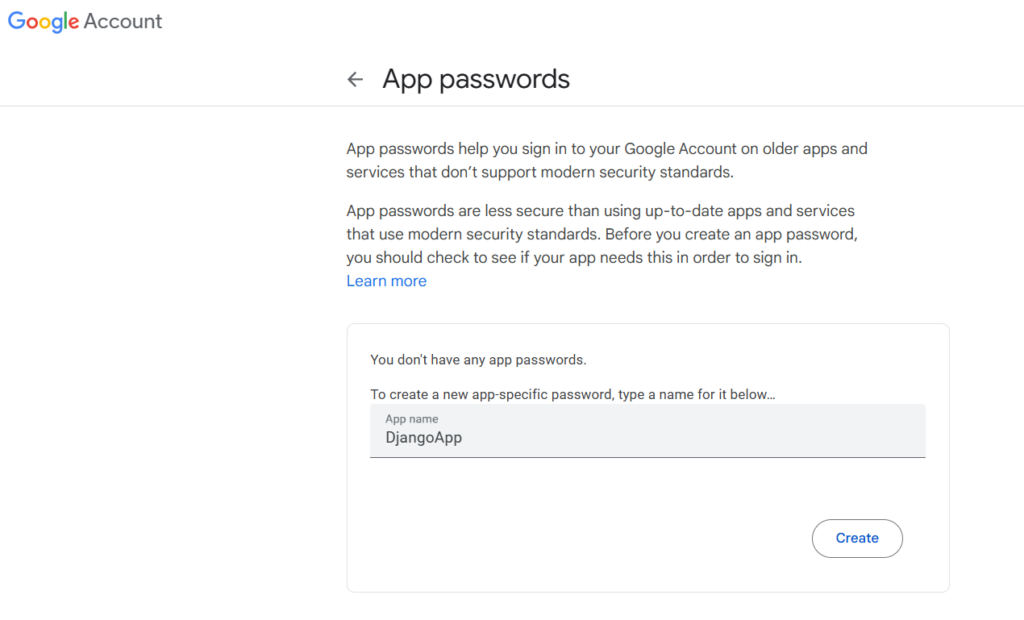
Step 2: Generate an App Password
- As soon as 2-Step Verification is enabled, search “App Passwords” within the search bar.
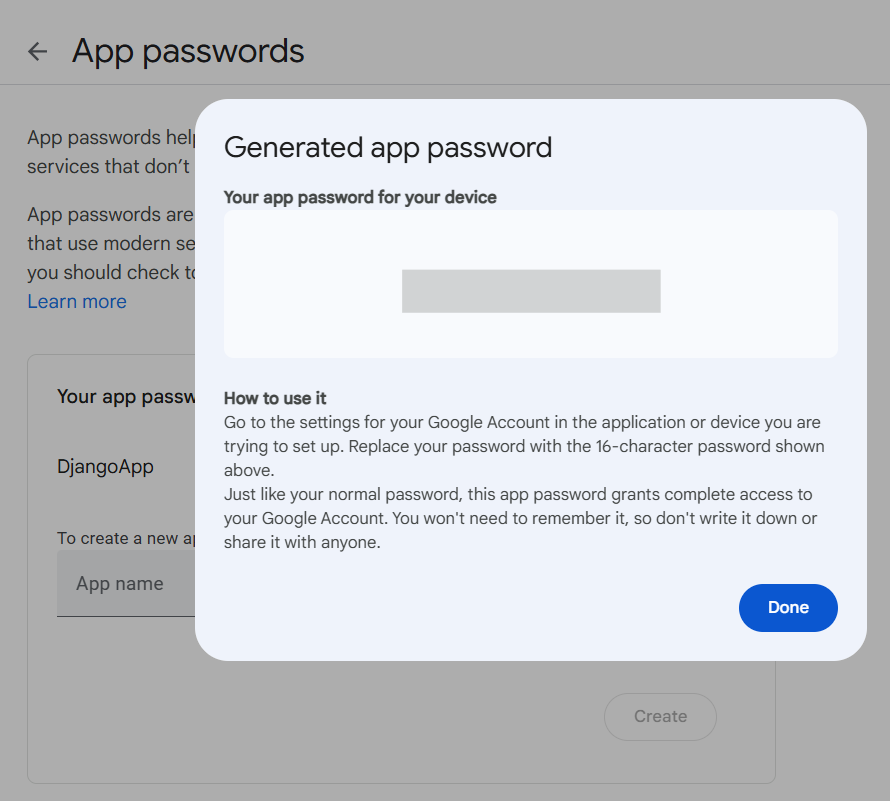
- There, enter the title for the App password and click on Create.
- Then, it can give an pop up modal with a 16-character App Password. Make certain to put it aside someplace since it can solely be proven as soon as.
If you happen to’re utilizing different e-mail suppliers, be sure to learn the next guides:
Utilizing Django Environ to Safe E mail Backend Credentials
Even if you happen to’re simply sending emails in growth, you shouldn’t write passwords instantly into the supply code. This turns into much more vital when utilizing a model management system together with GitHub to host your undertaking. You don’t need individuals to entry your information.
Let’s see how we are able to stop this through the use of Django-environ.
Create a .env file contained in the EmailProject listing (the place the settings.py file is positioned) with the command beneath:
cd EmailProject/
ls

settings.py

contact .env
Now, open that .env file and enter the next key–worth pairs:
EMAIL_HOST=smtp.gmail.com
EMAIL_HOST_USER=YourEmail@handle
EMAIL_HOST_PASSWORD=YourAppPassword
RECIPIENT_ADDRESS=TheRecieverOfTheMails
Breaking down the contents of this file:
- EMAIL_HOST: Your e-mail supplier’s SMTP server handle. See the e-mail host desk above for fast steerage. On this case, I’m utilizing smtp.gmail.com, the Gmail SMTP handle.
- EMAIL_HOST_USER: Your e-mail handle.
- EMAIL_HOST_PASSWORD: The app password you simply generated. Bear in mind it doesn’t embrace any areas.
- RECIPIENT_ADDRESS: The e-mail handle through which you’ll obtain the messages. It is a customized setting that we’ll create later to ship all of the emails to the identical recipient.
To make use of those environmental variables, we’ll want to put in Django-environ:
pip set up django-environNotice: be sure your digital surroundings is activated.
Now, open the settings.py positioned within the EmailProject listing and use the code beneath:
import environ

env = environ.Env()
environ.Env.read_env()


EMAIL_BACKEND = 'django.core.mail.backends.smtp.EmailBackend'
EMAIL_HOST = env('EMAIL_HOST')
EMAIL_PORT = 587
EMAIL_USE_TLS = True
EMAIL_HOST_USER = env('EMAIL_HOST_USER')
EMAIL_HOST_PASSWORD = env('EMAIL_HOST_PASSWORD')


RECIPIENT_ADDRESS = env('RECIPIENT_ADDRESS')
First, we’re importing the environ bundle on the prime of the settings file. Do not forget that all imports needs to be initially. Then we create an env variable which can include all the important thing–worth pairs obtainable on the .env.
The env(‘KEY’) assertion means we’re wanting up the worth of that key. Earlier than continuing, be sure to have arrange your .env file. In any other case, if some environmental variable isn’t set, you’ll get a Django ImproperlyConfigured error.
Notice: RECIPIENT_ADDRESS is a customized setting that we’ll use to ship emails to an handle we are able to entry.
Don’t overlook to incorporate the .env file in your .gitignore if you happen to’re utilizing Git and GitHub. You are able to do this simply by opening it and including the next line:
1. Sending Emails with the Django Shell
Lastly, we get to the juicy a part of the article! It’s time to ship your first e-mail to Django.
Open up a terminal, activate the digital surroundings, and run:
It will create a shell with all of the Django settings already configured for us. Inside that brand-new shell, paste the next code:
>>> from django.core.mail import send_mail
>>> from django.conf import settings
>>> send_mail(
...     topic='A cool topic',
...     message='A surprising message',
...     from_email=settings.EMAIL_HOST_USER,
...     recipient_list=[settings.RECIPIENT_ADDRESS])
1
We will additionally make a one-liner with out specifying the arguments:
>>> send_mail('A cool topic', 'A surprising message', settings.EMAIL_HOST_USER, [settings.RECIPIENT_ADDRESS])
1
Let’s break down the code above:
- We import the Django send_mail perform.
- Then we import the settings object, which incorporates all of the international settings and the per-site settings (these contained in the settings.py file).
- Lastly, we cross all of the wanted arguments to the send_mail perform. This perform returns the variety of emails despatched, on this case, 1.
Notice how we use the settings object to get the from_email (the e-mail you’re sending emails with) and the recipient_list (the RECIPIENT_ADDRESS customized setting we outlined within the .env).
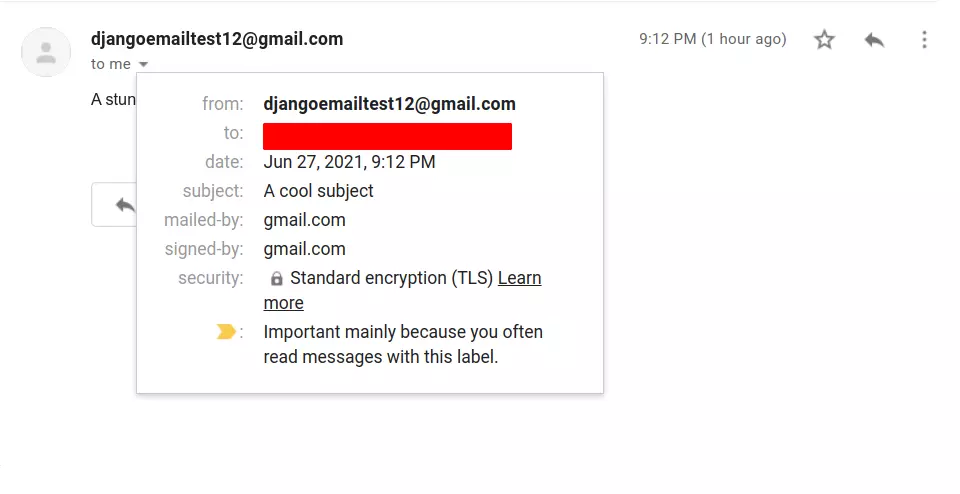
Now, if I examine my inbox — as I set the RECIPIENT_ADDRESS environmental variable to my e-mail handle — I’ll get the e-mail message despatched by Django.
Asynchronous E mail Sending
In Django 4.x, asynchronous e-mail sending is supported to enhance efficiency. That is helpful for high-traffic web sites or when sending bulk emails.
Right here’s how one can ship an e-mail asynchronously:
import asyncio
from django.core.mail import send_mail
from django.conf import settings

async def send_async_email():
    await send_mail(
        topic="Async E mail Check",
        message="This e-mail is shipped asynchronously with Django 4.x.",
        from_email=settings.EMAIL_HOST_USER,
        recipient_list=[settings.RECIPIENT_ADDRESS],
    )


asyncio.run(send_async_email())
Asynchronous e-mail sending is beneficial in eventualities like:
- Non-blocking operations the place sending an e-mail shouldn’t delay person requests.
- Sending bulk emails (use a activity queue like Celery for production-scale duties).
Notice: Whereas Django helps asynchronous e-mail, for production-scale bulk emails, use a background activity queue like Celery or Django-Q for true non-blocking operations.
On this part, we’ll construct an automatic contact type with Django kinds and the built-in send_mail perform. We’ll additionally create a customized perform, ship(), contained in the contact type so it’s simpler to implement it within the views.
Let’s begin by creating the contact app. Enter the undertaking root listing — the place handle.py is positioned — and run:
python handle.py startapp contactThen, set up it in your INSTALLED_APPS variable contained in the EmailProject/settings.py file:
INSTALLED_APPS = [
    'django.contrib.admin',
    ...


    'contact',
]
Earlier than advancing with the contact app, let’s configure the urlpatterns within the EmailProject/urls.py file. To do that, import the django.urls.embrace perform and embrace the contact URLs within the general undertaking. Don’t fear; we’ll configure the contact URLs later:
from django.contrib import admin
from django.urls import path, embrace

urlpatterns = [
    path('admin/', admin.site.urls),
    path('', include('contact.urls'))
]
Contact Kind
Enter the contact app folder and create a kinds.py file. It’s a great observe to outline your entire kinds within a kinds.py file, however it isn’t necessary. That’s why Django doesn’t embrace this file by default. You’ll be able to create the kinds file with the next instructions:
cd ../contact/

contact kinds.py
Open the file you simply created and make the next imports:
from django import kinds
from django.conf import settings
from django.core.mail import send_mail
The Django type module provides us all of the wanted lessons and fields to create our contact type. As soon as once more we’re importing the settings object and the send_mail perform to ship the emails.
Our contact type will include a number of fields and use two customized strategies: get_info(), which codecs the user-provided data, and ship(), which can ship the e-mail message. Let’s see this carried out in code:
from django import kinds
from .companies import send_contact_email


class ContactForm(kinds.Kind):

    title = kinds.CharField(max_length=120)
    e-mail = kinds.EmailField()
    inquiry = kinds.CharField(max_length=70)
    message = kinds.CharField(widget=kinds.Textarea)

    def get_info(self):
        """
        Technique that returns formatted data
        :return: topic, msg
        """

        cl_data = tremendous().clear()

        title = cl_data.get('title').strip()
        from_email = cl_data.get('e-mail')
        topic = cl_data.get('inquiry')

        msg = f'{title} with e-mail {from_email} mentioned:'
        msg += f'n"{topic}"nn'
        msg += cl_data.get('message')

        return topic, msg

    def ship(self):

        topic, msg = self.get_info()

        send_mail(
            topic=topic,
            message=msg,
            from_email=settings.EMAIL_HOST_USER,
            recipient_list=[settings.RECIPIENT_ADDRESS]
        )
This class is large, so let’s break down what we do in every half. Firstly, we outline 4 fields that will probably be required to ship the e-mail message:
Heading into the customized strategies, we’re solely utilizing the get_info technique to format the person’s data and return two variables: topic, which is nothing however the inquiry subject, and message, which would be the precise e-mail message despatched by Django.
Alternatively, the ship() technique solely will get the formatted information from get_info and sends the message with the send_mail perform. Though this part was fairly giant, you’ll see how we simplified the contact views by implementing all of the sending logic to the ContactForm itself.
Contact Views
Open the contact/views.py file and add the next imports:
from django.views.generic import FormView, TemplateView
from .kinds import ContactForm
from django.urls import reverse_lazy
As you’ll be able to see, we’re going to make use of Django generic views, which saves us a ton of time when making easy duties — for instance, when establishing a type with FormView or making a view that solely renders a template with TemplateView.
Additionally, we’re importing the ContactForm that we constructed within the earlier part and the reverse_lazy perform used when working with class-based views. Persevering with with the views, let’s write the ContactView:
class ContactView(FormView):
    template_name = 'contact/contact.html'
    form_class = ContactForm
    success_url = reverse_lazy('contact:success')

    def form_valid(self, type):

        type.ship()
        return tremendous().form_valid(type)
As you’ll be able to see, we’re constructing a easy FormView utilizing the ContactForm we created. We’re additionally establishing the template_name and the success_url. We’ll write the HTML template and arrange the URLs later.
The type legitimate technique allow us to ship the e-mail utilizing the ContactForm.ship() technique provided that all of the fields of the shape are legitimate. This suggests that if the person enters invalid enter — reminiscent of an unformatted e-mail handle — the message received’t be despatched.
The above form_valid technique implementation can be equal to the next in a function-based view:
if request.technique == 'POST':
    type = ContactForm(request.POST)
    if type.is_valid():
        type.ship()
        return redirect('contact:success')
else:
    type = ContactForm())
Ending this part, we’re going to put in writing a ContactSucessView, which can present successful message to the person. Since we’ve already imported the TemplateView class, we solely have to inherit from it and outline the template_name attribute:
class ContactSuccessView(TemplateView):
    template_name = 'contact/success.html'
You’ll be able to try the views.py file on the GitHub repository when you have any considerations.
Contact URLs
It’s time to create the URL patterns of the contact app. Since Django doesn’t give us the urls.py file by default, we’ll have to create it with the next command (be sure to be contained in the contact app folder):
Open that file and arrange the app_name and urlpatterns variables:
from django.urls import path
from .views import ContactView, ContactSuccessView

app_name = 'contact'

urlpatterns = [
    path('', ContactView.as_view(), name="contact"),
    path('success/', ContactSuccessView.as_view(), name="success"),
]
We use path to incorporate the route and its correspondent view to the URL configuration of the app. Once we set the app_name variable to ‘contact’, it means the URL namespacing of the app will appear like this:
contact:name_of_path

contact:contact

contact:success
Notice: a namespace is what we name URLs dynamically in Django templates and Views.
You’ll be able to be taught extra in regards to the Django URL dispatcher within the official documentation.
Writing templates
Django templates are the popular technique to show information dynamically, utilizing HTML and particular tags supplied by the Django Template Language.
For this particular app, we’ll be utilizing three templates:
- base.html: All the opposite templates will inherit from it. It’ll include the HTML skeleton that each one templates will need to have, in addition to hyperlinks to Bootstrap.
- contact.html: Shows the contact type.
- success.html: Shows successful message.
Let’s begin by creating the contact’s app template construction (be sure to’re contained in the contact app folder):
mkdir -p templates/contact/
cd templates/contact
contact base.html contact.html success.html
The instructions above create the everyday template construction of a reusable Django app — appname/templates/appname — and the tree template recordsdata I discussed earlier than. Right here’s what the app file construction ought to now appear like:
.
├── admin.py
├── apps.py
├── kinds.py
├── __init__.py
├── migrations
│   └── __init__.py
├── fashions.py
├── templates
│   └── contact
│       ├── base.html
│       ├── contact.html
│       └── success.html
├── exams.py
├── urls.py
└── views.py
Let’s leap into the content material of the bottom.html template:
DOCTYPE html>
<html lang="en">

  <head>
    <meta charset="UTF-8" />
    <meta http-equiv="X-UA-Suitable" content material="IE=edge" />
    <meta title="viewport" content material="width=device-width, initial-scale=1.0" />
    <title>Django E mail Shiptitle>
    <hyperlink href="https://cdn.jsdelivr.web/npm/bootstrap@5.0.0/dist/css/bootstrap.min.css" rel="stylesheet"
      integrity="sha384-wEmeIV1mKuiNpC+IOBjI7aAzPcEZeedi5yW5f2yOq55WWLwNGmvvx4Um1vskeMj0" crossorigin="nameless" />
  head>

  <physique>
    {% block physique %}

    {% endblock %}
    <script src="https://cdn.jsdelivr.web/npm/bootstrap@5.0.0/dist/js/bootstrap.bundle.min.js"
      integrity="sha384-p34f1UUtsS3wqzfto5wAAmdvj+osOnFyQFpp4Ua3gs/ZVWx6oOypYoCJhGGScy+8" crossorigin="nameless">
    script>
  physique>

html>
As you’ll be able to see, it’s the easy skeleton of an HTML file that features hyperlinks to Bootstrap 5. This permits us to stylize our contact app with out utilizing CSS recordsdata. The {% block name-of-block %} tag permits us to arrange a placeholder that “little one templates” will make the most of. The usage of this tag makes template inheritance a straightforward activity.
Earlier than heading into the kinds, you’ll want to put in the Django crispy kinds bundle, which permits us to stylize them simply:
pip set up django-crispy-formsAs soon as once more, crispy_forms is a Django app, and we have to embrace it on the INSTALLED_APPS listing:
INSTALLED_APPS = [
    ...


    'crispy_forms',


    'contact',
]


CRISPY_TEMPLATE_PACK = 'bootstrap4'
We use the template pack of Bootstrap 4, as a result of the Bootstrap type lessons are appropriate between the 4th and fifth model (on the time of writing).
Now, let’s work on the contact.html template:
{% extends 'contact/base.html' %}
{% load crispy_forms_tags %}

{% block physique %}
<div class="mx-auto my-4 text-center">
    <h1>Contact Ush1>
div>
<div class="container">
    <type motion="" technique="publish">
        {% csrf_token %}
        { crispy }
    <button class="btn btn-success my-3" kind="submit">Ship messagebutton>
    type>
div>
{% endblock %}
Notice how we prolonged the bottom template and make use of the block placeholder. That is what makes Django Template Language so environment friendly, because it lets us save loads of HTML copying and pasting.
Speaking in regards to the type, we’re utilizing the tactic “publish”, which implies that our ContactView will course of the info given by the person and ship the e-mail if the shape is legitimate. The {% csrf_token %} is necessary in each type due to safety causes. Django’s documentation has a devoted web page on CSRF tokens and the explanations to make use of them when working with kinds.
We’ll be rendering the shape with the crispy template tag, which is why we loaded the crispy tags with {% load crispy_forms_tags %}.
Lastly, let’s write the success.html template:
{% extends 'contact/base.html' %}
{% block physique %}
<div class="mx-auto my-4 text-center">
<h1 class="fw-bolder text-success">We despatched your messageh1>
<p class="my-5">You'll be able to ship one other within the <a href="{% url 'contact:contact' %}">contact web pagea>p>
div>
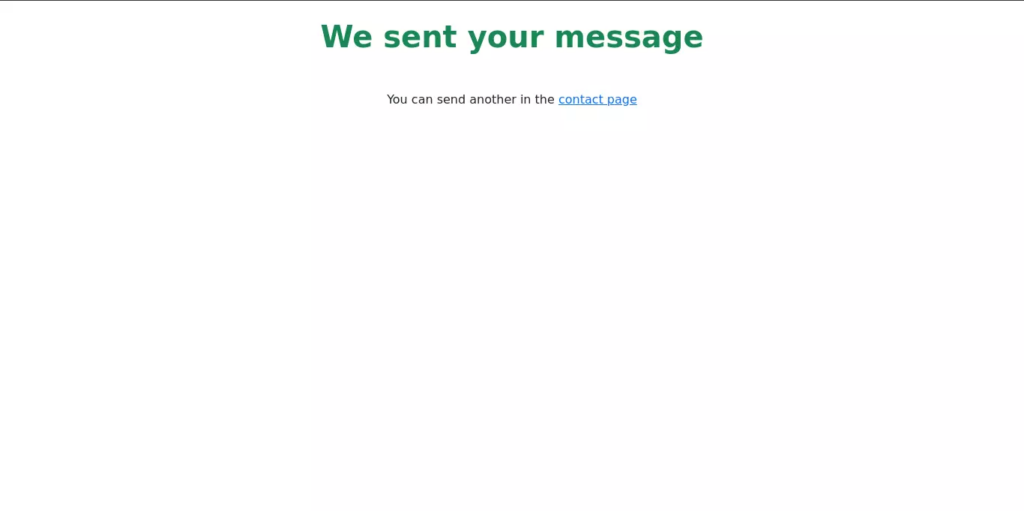
{% endblock %}As you’ll be able to see, it’s a easy success announcement with a hyperlink to the contact type in case the person desires to ship one other message.
Let’s run the server once more and go to http://localhost:8000 (be sure to have the .venv activated and also you’re contained in the undertaking root folder):
python handle.py runserverThe picture beneath reveals what the ultimate contact type seems like.

And that is a picture of the success message.
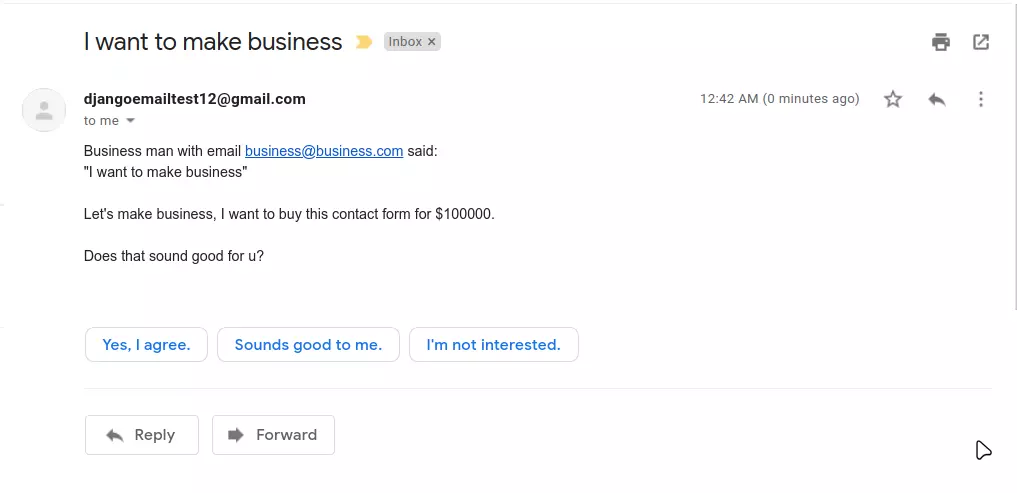
And right here’s a picture of the e-mail within the inbox.
Greatest Practices to Observe
1. Reusable E mail Sending Operate
To make your email-sending logic modular and reusable, you’ll be able to transfer the e-mail sending perform to a helper perform:
from django.core.mail import send_mail
from django.conf import settings

def send_contact_email(topic, message, recipient):
    send_mail(
        topic=topic,
        message=message,
        from_email=settings.EMAIL_HOST_USER,
        recipient_list=[recipient],
        fail_silently=False,
    )
Now you can name this perform wherever it’s good to ship emails, together with your contact type.
2. Unit Testing
You should utilize django.check to check ship e-mail Django functionalities.
from django.check import TestCase
from django.core.mail import send_mail

class EmailTest(TestCase):
    def test_email_sending(self):
        response = send_mail(
            topic='Check Topic',
            message='Check Message',
            from_email='from@instance.com',
            recipient_list=['to@example.com'],
        )
        self.assertEqual(response, 1)
3. Sending Wealthy HTML Emails
HTML emails present higher design and presentation. Use Django’s template engine to create wealthy e-mail content material:
from django.core.mail import EmailMultiAlternatives
from django.template.loader import render_to_string
from django.conf import settings

def send_html_email():
    topic = 'HTML E mail Instance'
    from_email = settings.EMAIL_HOST_USER
    recipient = ['recipient@example.com']
    html_content = render_to_string('email_template.html', {'key': 'worth'})

    msg = EmailMultiAlternatives(topic, physique='', from_email=from_email, to=recipient)
    msg.attach_alternative(html_content, "textual content/html")
    msg.ship()
4. Integrating Third-Celebration E mail Providers
For production-ready purposes, think about using third-party companies reminiscent of SendGrid, Mailgun, or AWS SES. These companies supply superior options like e-mail analytics, supply monitoring, and spam filtering.
EMAIL_BACKEND = 'sendgrid_backend.SendgridBackend'
SENDGRID_API_KEY = 'your-api-key'
SENDGRID_SANDBOX_MODE_IN_DEBUG = False
5. E mail Verification in Person Registration
Ship e-mail verification hyperlinks throughout person registration to forestall spam accounts.
from django.core.mail import send_mail
from django.utils.http import urlsafe_base64_encode
from django.utils.encoding import force_bytes
from django.template.loader import render_to_string

def send_verification_email(person, request):
    token = account_activation_token.make_token(person)
    uid = urlsafe_base64_encode(force_bytes(person.pk))
    hyperlink = request.build_absolute_uri(f'/activate/{uid}/{token}/')
    message = render_to_string('activation_email.html', {'hyperlink': hyperlink})
    send_mail('Confirm your e-mail', message, 'from@instance.com', [user.email])
Wrapping up
Congrats! You’ve discovered learn how to ship emails with Django and learn how to construct a Django contact type as properly.
There are lots of methods to ship emails with Django. On this tutorial, you’ve made it along with your private e-mail handle, however I’d such as you to discover different instruments and combine them into your initiatives.
On this tutorial, we’ve lined the next:
- The way to arrange Django settings to serve emails
- The way to use a private e-mail account to ship emails in a small undertaking
- The way to use .env recordsdata to make use of delicate information in a Django undertaking
- The way to construct an automatic contact type
For extra on Django, try “Construct a Photograph-sharing App with Django”.
FAQs on Django Ship E mail with SMTP Server
Can I Ship an E mail from Django?
Sure, Django supplies a built-in email-sending framework that makes it easy to ship emails. By configuring the SMTP settings in your settings.py file, you’ll be able to ship emails utilizing the send_mail perform or EmailMessage class.
The way to Ship E mail in Django?
To configure Django for sending emails:
- Set the SMTP particulars in your settings.py file:
EMAIL_BACKEND = 'django.core.mail.backends.smtp.EmailBackend' EMAIL_HOST = 'smtp.gmail.com' EMAIL_PORT = 587 EMAIL_USE_TLS = True EMAIL_HOST_USER = 'your_email@instance.com' EMAIL_HOST_PASSWORD = 'your_app_password' - Use a safe Password as an alternative of your fundamental e-mail password if you happen to’re utilizing Gmail or comparable suppliers.
- For manufacturing, think about using third-party companies like SendGrid, Mailgun, or Amazon SES for higher scalability.
The way to Ship Outlook Mail in Django?
To ship Outlook mail in Django, you need to use Django’s e-mail sending performance with the SMTP settings for Outlook. In your Django undertaking’s settings.py file, configure the SMTP settings for Outlook. These settings will allow Django to hook up with the Outlook SMTP server to ship emails.
The way to Obtain Emails in Django?
In your Django undertaking’s settings.py, configure your incoming e-mail server settings. You usually want the IMAP (Web Message Entry Protocol) server particulars in your e-mail supplier, together with authentication credentials. Subsequent, use the imaplib library to hook up with your e-mail server and retrieve emails. You are able to do this in your Django views or customized administration instructions. After getting fetched an e-mail, you’ll be able to course of it, extract data, and carry out any mandatory actions inside your Django utility. This might contain parsing the e-mail content material, storing related information in your database, or triggering particular actions based mostly on the e-mail’s content material or sender.
How Do I Check E mail Sending in Django With out Sending Actual Emails?
Throughout growth, you need to use an non-obligatory e-mail backend to check emails with out connecting to an actual SMTP server. For instance: Console E mail Backend: Prints e-mail messages to the terminal as an alternative of sending them.
EMAIL_BACKEND = 'django.core.mail.backends.console.EmailBackend'For extra superior testing, use instruments like MailHog or Mailtrap, which act as pretend SMTP servers for capturing and displaying check emails.
How Do I Handle Delicate E mail Credentials Securely?
Use Django Environ to load delicate credentials (like e-mail host, username, and password) from a .env file:
- Set up Django Environ:
pip set up django-environ - Create a .env file:
EMAIL_HOST=smtp.gmail.com EMAIL_HOST_USER=your_email@instance.com EMAIL_HOST_PASSWORD=your_app_password - Load the .env file in settings.py:
import environ env = environ.Env() environ.Env.read_env() EMAIL_HOST = env('EMAIL_HOST') EMAIL_HOST_USER = env('EMAIL_HOST_USER') EMAIL_HOST_PASSWORD = env('EMAIL_HOST_PASSWORD')


