Web page transitions assist create a smoother, extra linked expertise by avoiding abrupt web page adjustments and making navigation really feel extra steady.
With Barba.js, we will intercept web page navigation and cargo the following web page within the background. This lets us change content material dynamically and animate the transition between the present web page and the following one.
What We’re Constructing
On this tutorial, we’ll construct a small web page transition system with Barba.js, GSAP, and some supporting utilities. We’ll begin with a easy synced reveal, then step by step discover extra expressive results utilizing WebGL, SVG morphing, overlay-based transitions, and animated pseudo-elements, all impressed by some actually epic websites.
The objective isn’t just to recreate a single animation, however to know a versatile construction that may assist totally different transition kinds throughout a mission constructed with Astro. By the tip, you’ll have a reusable basis for creating richer navigation experiences with out reloading your complete web page.
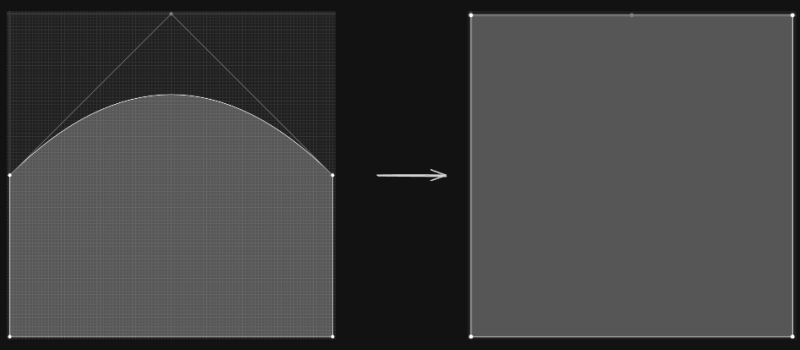
HTML Construction
We have to put together a easy HTML construction that Barba.js can use to manage web page navigation. As an alternative of reloading the entire web page, Barba.js solely replaces a particular a part of the structure when transferring between pages. On this mission, this construction is positioned inside a base structure so it may be reused throughout all pages.
The data-barba="wrapper" attribute marks the aspect that wraps your complete web page, whereas data-barba="container" defines the half that may change throughout navigation. The data-barba-namespace attribute offers every web page a reputation, which might be helpful later if we need to create totally different transitions for various pages. On this setup, the namespace worth comes from a uid prop that’s handed from every web page to the structure.
Styling the Structure
After organising the structure construction, we will add some primary kinds for our major content material wrapper. On this instance, the .content material class is used as the principle wrapper for the content material inside every web page. It helps hold the structure constant and facilities the content material on the display screen.
.app__wrapper {
  background-color: var(--base-background);
  coloration: var(--base-text);
  top: 100svh;
}

.content__wrapper {
  width: 100%;
  min-height: 100svh;
  place: relative;
}

.content material {
  min-height: 100svh;
  width: 100%;
  show: flex;
  align-items: middle;
  justify-content: middle;
}

.content material .title {
  font-size: 15vw;
  text-transform: uppercase;
}
The .content material aspect acts as a easy wrapper for your complete web page content material. It makes use of flexbox to middle parts each vertically and horizontally, making it simpler to place titles or sections in the midst of the display screen. This retains the structure easy whereas giving us a clear base earlier than including the web page transitions.
Let’s begin constructing our personal customized transition.
Stipulations & Helpers
Earlier than we leap into the transitions, this mission depends on a couple of small utilities and helper courses:
choose()→ a easy helper operate for querying DOM partsMotionText→ a customized class used to animate cut up textual content (constructed with GSAP’s SplitText)vertexShaderandfragmentShader→ used for the WebGL transition impact- Utility features like
hexToRgb
To maintain this tutorial centered on web page transitions, we gained’t cowl these intimately right here. You’ll find their full implementation within the mission supply information.
JavaScript
class App {
  constructor() {
    this.motionTexts = new MotionText();
    this.motionTexts.init();
    this.motionTexts.animationIn();

    this.barbaWrapper = choose("[data-barba='wrapper']");

    barba.init({
      transitions: [
        {
           // We will make custom transition inside here
        },
      ],
    });
  }
}

doc.addEventListener("DOMContentLoaded", () => {
  gsap.registerPlugin(CustomEase, SplitText);

  CustomEase.create("hop", "0.56, 0, 0.35, 0.98");

  new App();
});
We’ll hold the transition logic inside an App class.
Contained in the constructor, we create a property referred to as barbaWrapper. This property selects the principle wrapper aspect recognized by data-barba="wrapper". This aspect is required by Barba.js as the principle wrapper that wraps all web page containers.
After that, we name barba.init() to initialize the web page transition system and outline the place our customized transitions might be positioned.
Outdoors the category, we pay attention for the DOMContentLoaded occasion. As soon as it fires, we first register the GSAP plugin CustomEase, then create a customized easing referred to as "hop" that might be used later in our animations. Lastly, we instantiate the App class to initialize the applying.
Barba.js Ideas in This Mission
Lifecycle

When a navigation occurs, Barba.js runs a number of lifecycle hooks in a particular order, equivalent to beforeLeave, depart, afterLeave, beforeEnter, enter, and afterEnter. Understanding this circulate makes it simpler to resolve the place our transition animation ought to begin and finish.
Guidelines
Guidelines outline how Barba.js decides which transition needs to be used. Guidelines are divided into two sorts: key phrases and situations. On this mission, we use situation guidelines to find out when a transition ought to run.
Sync Mode
Sync mode is without doubt one of the strongest options in Barba.js. By default, the sync worth is about to false, however we will change it relying on our wants. When sync is about to true, the depart and enter hooks run on the similar time. This will create a smoother and extra partaking expertise for customers.
It additionally permits us to animate each the present container and the subsequent container collectively. For instance, we will create a transition that appears like a sliding aspect utilizing methods equivalent to clip-path or rework.
First Transition
This primary transition is predicated on the one seen on https://cielrose.television/ and we’ll title it default-transition. On this transition, we use a number of hooks: earlier than, enter, and after from Barba.js.
We additionally allow sync mode on this transition to see how this characteristic works. With sync mode enabled, we will animate each containers on the similar time, permitting us to animate each the present container and the subsequent container collectively.
{
  title: "default-transition",
  earlier than: () => {},
  enter: () => {},
  after: () => {},
  sync: true
}
earlier than: (information) => {
this.barbaWrapper.classList.add("is__transitioning");
gsap.set(information.subsequent.container, {
place: "fastened",
inset: 0,
scale: 0.6,
clipPath: "inset(100% 0 0 0)",
zIndex: 3,
willChange: "auto",
});
gsap.set(information.present.container, {
zIndex: 2,
willChange: "auto",
});
},Within the earlier than operate, we outline the preliminary state for each the present and subsequent containers.
We additionally add an additional class referred to as is__transitioning to the wrapper aspect (data-barba="wrapper"). This class disables interplay by making use of pointer-events: none; to all anchor tags so customers can’t set off one other navigation whereas a transition continues to be working. This prevents animations from overlapping throughout a transition in Barba.js.
enter: (information) => {
  const contentCurrent = information.present.container.querySelector(".content__wrapper");

  const tl = gsap.timeline({
    defaults: {
      period: 1.25,
      ease: "power3.inOut",
    },
    onComplete: () => tl.kill(),
  });

  tl.to(information.present.container, {
    scale: 0.6,
  });

  tl.to(information.present.container, {
    opacity: 0.45,
    ease: "power3",
  });

  tl.to(
    contentCurrent,
    {
      yPercent: -10,
      ease: "power3"
    },
    "<",
  );

  tl.to(
    information.subsequent.container,
    {
      clipPath: "inset(0% 0 0 0)",
      ease: "power3",
    },
    "<",
  );

  tl.to(information.subsequent.container, {
    scale: 1,
    onStart: () => {
      this.motionTexts.destroy(); // Destroy movement textual content for the present container
      this.motionTexts.init(information.subsequent.container); // Initialize movement textual content for the following container
      this.motionTexts.animationIn(); // Animate cut up textual content for subsequent container
    },
  });

  return new Promise((resolve) => {
    tl.name(() => {
      resolve();
    });
  });
},
Now let’s implement the animation contained in the enter operate. Since sync mode is enabled, each the present and subsequent containers can be found concurrently within the transition lifecycle. This permits us to animate them collectively inside a single GSAP timeline.
We choose the .content__wrapper aspect inside the present container so as to add a small parallax impact whereas the following container strikes from the underside to the highest utilizing a clip-path animation.
after: (information) => {
  this.barbaWrapper.classList.take away("is__transitioning");

  gsap.set(information.subsequent.container, {
    clearProps: "all",
  }); // Clear all inline GSAP kinds to keep away from conflicts with new animations
},
Lastly, within the after operate, we carry out a small cleanup on the subsequent container.
Right here we take away all inline kinds that had been utilized throughout the animation by utilizing clearProps from GSAP.
We additionally take away the is__transitioning class from the wrapper so all anchor tags might be clicked once more after the transition finishes in Barba.js.
Right here is the preview for the primary transition:
Second Transition
This subsequent transition is predicated on https://www.faint-film.com/.
{
  title: "example-2-transition",
  to: {
    namespace: ["about"], // Situation's rule
  },
  earlier than: () => {},
  depart: () => {},
  after: () => {},
}
We’ll title it example-2-transition. On this transition we use the to situation rule, which suggests the transition will run solely when the subsequent container has data-barba-namespace="about" in Barba.js.
For the idea of this second transition, we use a WebGL noise impact. A mesh will seem with a particular coloration, and the shader will reveal it utilizing a noise sample. Due to this noise operate, the colour seems in a random approach throughout the floor, making a extra natural and dynamic transition impact.
Setting Up WebGL
To maintain issues organized, the WebGL logic is positioned inside a category referred to as WebGLPageTransition.
class WebGLPageTransition {
  constructor() {
    const rootStyle = getComputedStyle(doc.documentElement);

    this.coloration = hexToRgb(rootStyle.getPropertyValue("--about-background"));

    this.dimension = {
      width: window.innerWidth,
      top: window.innerHeight,
      pixelRatio: Math.min(window.devicePixelRatio, 1),
    };

    this.cameraZ = 100;

    this.createScene();
    this.createCamera();
    this.createRenderer();
    this.createGeometry();
    this.createMesh();

    this.onResize();

    this.updateMeshSize();
  }

  createScene() {
    this.scene = new THREE.Scene();
  }

  createCamera() {
    const fov =
      2 * Math.atan(this.dimension.top / 2 / this.cameraZ) * (180 / Math.PI);
    this.digital camera = new THREE.PerspectiveCamera(
      fov,
      window.innerWidth / window.innerHeight,
      0.1,
      1000,
    );

    this.scene.add(this.digital camera);

    this.digital camera.place.z = this.cameraZ;
  }

  createRenderer() {
    this.renderer = new THREE.WebGLRenderer({
      alpha: true,
      antialias: true,
    });

    doc.physique.appendChild(this.renderer.domElement);

    this.renderer.domElement.id = "webgl";

    this.renderer.setSize(this.dimension.width, this.dimension.top);
    this.renderer.render(this.scene, this.digital camera);

    this.renderer.setPixelRatio(this.dimension.pixelRatio);
  }

  createGeometry() {
    this.geometry = new THREE.PlaneGeometry(1, 1);
  }

  onResize() {
    this.dimension.width = window.innerWidth;
    this.dimension.top = window.innerHeight;
    this.dimension.pixelRatio = Math.min(window.devicePixelRatio, 1);

    // Resize digital camera
    this.digital camera.side = this.dimension.width / this.dimension.top;
    this.digital camera.fov =
      2 * Math.atan(this.dimension.top / 2 / this.cameraZ) * (180 / Math.PI);
    this.digital camera.updateProjectionMatrix();

    // Resize renderer
    this.renderer.setSize(this.dimension.width, this.dimension.top);
    this.renderer.setPixelRatio(this.dimension.pixelRatio);

    this.updateMeshSize();
  }

  render() {
    this.renderer.render(this.scene, this.digital camera);
  }
}
The WebGLPageTransition class units up the fundamental WebGL atmosphere utilizing Three.js. Within the constructor, we learn a coloration from the CSS variable --about-background and retailer the present viewport dimension and pixel ratio. These values are used to maintain the WebGL canvas aligned with the browser window.
The strategies createScene, createCamera, and createRenderer create the core WebGL setup. The scene acts as the principle container for all objects, the digital camera defines how the scene is seen, and the renderer creates the WebGL canvas that’s appended to the doc. A easy PlaneGeometry can also be created, which can later be used because the floor for the shader transition.
The onResize technique updates the digital camera and renderer each time the window dimension adjustments so the canvas all the time matches the viewport. Lastly, the render technique attracts the scene utilizing the digital camera each time the WebGL layer must be up to date.
Creating the Mesh and Shader Materials
createMesh() {
  this.materials = new THREE.ShaderMaterial({
    uniforms: {
      uColor: {
        worth: new THREE.Vector3(
          this.coloration.r / 255,
          this.coloration.g / 255,
          this.coloration.b / 255,
        ),
      },
      uProgress: {
        worth: 1.5,
      },
    },
    vertexShader,
    fragmentShader,
    clear: true,
  });

  this.mesh = new THREE.Mesh(this.geometry, this.materials);

  this.scene.add(this.mesh);
}
Right here we create a customized ShaderMaterial. The shader receives two uniforms:
uColor→ the background coloration used within the impactuProgress→ a price that may management the transition animation
The geometry and materials are mixed right into a mesh, which is then added to the scene.
Under is the fragment shader used for the impact:
various vec2 vUv;
uniform float uProgress;
uniform vec3 uColor;

// Useful resource noise operate : https://gist.github.com/patriciogonzalezvivo/670c22f3966e662d2f83

float rand(vec2 n) {
	return fract(sin(dot(n, vec2(12.9898, 4.1414))) * 43758.5453);
}

float noise(vec2 p){
	vec2 ip = ground(p);
	vec2 u = fract(p);
	u = u*u*(3.0-2.0*u);

	float res = combine(
		combine(rand(ip),rand(ip+vec2(1.0,0.0)),u.x),
		combine(rand(ip+vec2(0.0,1.0)),rand(ip+vec2(1.0,1.0)),u.x),u.y);
	return res*res;
}

void major(){
  float noise = noise(vUv * 5.);

  float edge = 0.185;

  float disolve = smoothstep(1. - uProgress - edge, 1. - uProgress + edge, noise);

  float alpha = 1. - disolve;

  gl_FragColor = vec4(uColor, alpha);
}
This shader makes use of a noise operate to create an irregular dissolve impact throughout the display screen. The uProgress uniform controls how the dissolve spreads throughout the floor. As the worth adjustments, the smoothstep operate step by step reveals or hides elements of the airplane based mostly on the noise sample. Lastly, the shader outputs a coloration utilizing uColor, whereas the computed alpha worth controls the transparency. This creates a gentle dissolve transition that we will animate later throughout the web page transition.
Updating the Mesh Dimension
updateMeshSize() {
  this.mesh.scale.set(this.dimension.width, this.dimension.top, 1);
}
This technique scales the airplane so it all the time matches the dimensions of the display screen.
After creating the WebGLPageTransition class, we will initialize it inside the principle App class. We additionally add a small render loop so the WebGL scene can repeatedly replace.
Contained in the constructor, we create a brand new occasion of the WebGL class and begin the render loop.
constructor() {
  this.barbaWrapper = choose("[data-barba='wrapper']");

  this.webglPageTransition = new WebGLPageTransition();

  this.render();
  this.addEventListeners();

  barba.init({
    transitions: [
      {
      },
    ],
  });
}
Subsequent, we add a couple of helper strategies to manage the WebGL occasion.
onResize() {
  this.webglPageTransition.onResize();
}

addEventListeners() {
  window.addEventListener("resize", this.onResize.bind(this));
}

render() {
  this.webglPageTransition.render();
  requestAnimationFrame(this.render.bind(this));
}
The render() technique creates a render loop utilizing requestAnimationFrame. This repeatedly calls the WebGL render technique so the scene can replace each body. The onResize() technique merely forwards the resize occasion to the WebGL class so the renderer and digital camera can replace when the window dimension adjustments.
Animating a WebGL Noise Transition
earlier than: () => {
  this.barbaWrapper.classList.add("is__transitioning");
}
Within the earlier than operate of this transition, we merely add the is__transitioning class to the wrapper aspect.
This class is used to briefly disable interactions, equivalent to clicking on hyperlinks, whereas the transition is working in Barba.js.
depart: () => {
  const tl = gsap.timeline({
    defaults: {
      period: 1,
      ease: "power1.in",
    },
    onComplete: () => tl.kill(),
  });

  gsap.set("#webgl", {
    pointerEvents: "auto",
    autoAlpha: 1,
    visibility: "seen",
  });

  tl.to(this.webglPageTransition.materials.uniforms.uProgress, {
    worth: -0.75,
  });

  return new Promise((resolve) => {
    tl.name(() => {
      this.motionTexts.destroy(); // Destroy movement textual content for the present container
      resolve();
    });
  });
},
Right here we first make the WebGL canvas seen so the shader impact can seem above the web page. Then we animate the uProgress uniform from the shader materials. Since this worth controls the dissolve impact within the shader, altering it creates the transition that covers the display screen.
after: () => {
  const tl = gsap.timeline({
    defaults: {
      period: 1,
      ease: "power1.in",
    },
    onComplete: () => {
      gsap.set("#webgl", {
        pointerEvents: "none",
        autoAlpha: 0,
        visibility: "hidden",
      });

      tl.kill();
    },
  });

  tl.to(this.webglPageTransition.materials.uniforms.uProgress, {
    worth: 1.5,
  });

  return new Promise((resolve) => {
    tl.name(() => {
      this.barbaWrapper.classList.take away("is__transitioning");
      resolve();
    });
  });
},
Right here we animate the uProgress worth again to 1.5, which hides the WebGL impact once more. After the animation finishes, we cover the WebGL canvas.
Right here the preview for the second transition:
Third Transition
For the third transition, we’ll create a easy morphing animation on an SVG path utilizing MorphSVGPlugin. It’s based mostly this GSAP demo.
Earlier than beginning the animation, we first have to create a component that might be used for this impact utilizing SVG.
Setting Up the SVG Morph Transition
The aspect
Component kinds
.transition__morph__svg {
  place: fastened;
  high: 0;
  left: 0;
  width: 100%;
  top: 100dvh;
  pointer-events: none;
  z-index: 100;
  visibility: hidden;
}

.transition__morph__svg svg path {
  fill: var(--works-overlay);
  stroke: var(--works-overlay);
}
After creating the aspect for the SVG morph transition, we have to register the MorphSVGPlugin first.
import MorphSVGPlugin from "gsap/MorphSVGPlugin";

gsap.registerPlugin(SplitText, CustomEase, MorphSVGPlugin);
{
title: "example-3-transition",
to: {
namespace: ["works"],
},
earlier than: () => {},
depart: () => {},
after: () => {},
}earlier than: () => {
this.barbaWrapper.classList.add("is__transitioning");
},Within the earlier than operate, we merely add the is__transitioning class to the wrapper to disable all anchor interactions throughout the transition.
depart: () => {
  const tl = gsap.timeline({
    defaults: {
      period: 1,
      ease: "none",
    },
    onComplete: () => tl.kill(),
  });

  const path = choose(".transition__morph__svg svg path");

  gsap.set(".transition__morph__svg", {
    pointerEvents: "auto",
    autoAlpha: 1,
    visibility: "seen",
  });

  let enterCurve = 'M 0 100 V 50 Q 50 0 100 50 V 100 z',
    filledPath = 'M 0 100 V 0 Q 50 0 100 0 V 100 z';

  if (typeof information.set off === "string") {
    enterCurve = "M 0 0 V 50 Q 50 100 100 50 V 0 z";
    filledPath = "M 0 0 V 100 Q 50 100 100 100 V 0 z";

    gsap.set(path, {
      attr: {
        d: "M 0 0 V 0 Q 50 0 100 0 V 0 z",
      },
    });
  }

  tl.to(path, {
    morphSVG: enterCurve,
  });

  tl.to(
    path,
    {
      morphSVG: filledPath,
      ease: "sine"
    },
    "<+=.5",
  );

  return new Promise((resolve) => {
    tl.name(() => {
      this.motionTexts.destroy(); // Destroy movement textual content for the present container
      resolve();
    });
  });
},
Within the depart operate, we run a MorphSVG animation utilizing a single timeline from GSAP.
The morphSVG property adjustments the d attribute of the SVG path, making the form transition easily. On this animation, the trail first creates a curved form transferring upward, then expands till it totally covers the display screen.
after: () => {
  const path = choose(".transition__morph__svg svg path");
  const originalPath = path.dataset.originalPath;
  const tl = gsap.timeline({
    defaults: {
      period: 0.5,
      ease: "sine.in",
    },
    onComplete: () => {
      gsap.set(".transition__morph__svg", {
        pointerEvents: "none",
        autoAlpha: 0,
        visibility: "hidden",
      });

      gsap.set(path, {
        attr: { d: originalPath },
      });

      tl.kill();
    },
  });

  let leaveCurve = 'M 0 0 V 50 Q 50 0 100 50 V 0 z',
    unfilledPath = 'M 0 0 V 0 Q 50 0 100 0 V 0 z';

  if (typeof information.set off === 'string') {
     leaveCurve = 'M 0 100 V 50 Q 50 100 100 50 V 100 z';
     unfilledPath = 'M 0 100 V 100 Q 50 100 100 100 V 100 z';
  }

  tl.to(path, {
    morphSVG: leaveCurve,
  });

  tl.to(
    path,
    {
      morphSVG: unfilledPath,
      ease: "sine",
      onStart: () => {
        this.motionTexts.init(); // Initialize movement textual content for the following container
        this.motionTexts.animationIn(); // Animate cut up textual content for subsequent container
      }
    },
    "<+=.5",
  );

  return new Promise((resolve) => {
    tl.name(() => {
      this.barbaWrapper.classList.take away("is__transitioning");
      resolve();
    });
  });
},
Within the after operate, we animate the trail in the wrong way.
The form shrinks again from fullscreen right into a curve, and at last returns to its preliminary state. After that, we reset the unique d attribute, cover the SVG aspect, and take away the is__transitioning class so interactions are enabled once more.
Right here is the preview for the third transition:
Fourth Transition
This transition is predicated on https://bloomparis.television/.
{
  title: "example-4-transition",
  to: {
    namespace: ["team"],
  },
  earlier than: () => {},
  depart: () => {},
  after: () => {},
}
We are going to use a component referred to as transition__overlay. This aspect is positioned fastened, fills your complete display screen, and sits above the data-barba="container" parts utilized by Barba.js.
Inside this overlay, we place a title aspect that's positioned precisely within the middle of the display screen. This title might be used to show the vacation spot web page title and also will be animated throughout the transition.
Setting Up the Overlay Component
Overlay Component
Overlay Type
.transition__overlay {
  content material: "";
  place: fastened;
  high: 0;
  left: 0;
  width: 100%;
  top: 100dvh;
  z-index: 100;
  will-change: clip-path;
  pointer-events: none;
  visibility: hidden;
}

.transition__overlay .title__destination {
  place: absolute;
  width: 100%;
  high: 50%;
  left: 0;
  rework: translateY(-50%);
  text-transform: uppercase;
  font-size: 5vw;
  coloration: var(--team-text);
  text-align: middle;
  line-height: 1;
}
Constructor Setup
this.transitionOverlay = choose(".transition__overlay");

this.titleDestination = choose(".transition__overlay .title__destination");

this.splitTitleDestination = null;
Right here we retailer references to the overlay and the title aspect.
transitionOverlay→ the principle overlay aspect used within the transition.titleDestination→ the textual content that exhibits the vacation spot web page.splitTitleDestination→ initiallynull, later it's going to retailer the occasion created by GSAPSplitTextso we will animate every phrase individually.
Calculate Clip Share
getPercentageVerticalClipExample3() {
  const titleDestinationBound = this.titleDestination.getBoundingClientRect();
  const halfHeightTitleDestination = titleDestinationBound.top / 2;
  const halfHeightViewport = window.innerHeight / 2;

  this.percentageVerticalClip =
    (halfHeightTitleDestination / halfHeightViewport) * 50;
}getBoundingClientRect()will get the dimensions of the title aspect.- We calculate half of the title top.
- We additionally calculate half of the viewport top.
- Then we convert that worth right into a share relative to the viewport.
The result's saved in this.percentageVerticalClip. This worth will later be used to manage the clip-path animation so the transition initially opens precisely across the title space as an alternative of the complete display screen.
earlier than: (information) => {
  this.barbaWrapper.classList.add("is__transitioning");

  this.transitionOverlay.classList.add("team__transition");

  const nextDestination = information.subsequent.url.path
    .cut up("/")
    .filter(Boolean)
    .pop();

  this.titleDestination.innerHTML = `we'll ${nextDestination}`;

  if (this.splitTitleDestination) this.splitTitleDestination.revert();

  this.splitTitleDestination = new SplitText(this.titleDestination, {
    sort: "phrases",
    masks: "phrases",
    wordsClass: "phrases",
  });

  gsap.set(this.transitionOverlay, {
    "--clip": `polygon(0% ${50 - this.percentageVerticalClip}%, 0% ${50 - this.percentageVerticalClip}%, 0% ${50 + this.percentageVerticalClip}%, 0% ${50 + this.percentageVerticalClip}%)`,
  });
},
Within the earlier than hook, we extract the vacation spot web page title from information.subsequent.url.path. The code splits the URL into segments, removes empty values, and takes the final a part of the trail. This offers us the web page title (for instance "crew").
That worth is inserted into the title aspect so it shows:
we'll crewAfter that, we create a brand new SplitText occasion to separate the title into phrases. This permits every phrase to be animated individually.
Lastly, we set the preliminary clip-path worth utilizing a CSS variable. The overlay begins as a skinny horizontal strip positioned across the title.
depart: () => {
  const tl = gsap.timeline({
    defaults: {
      period: 1,
      ease: "expo.inOut",
    },
    onComplete: () => tl.kill(),
  });

  gsap.set(this.transitionOverlay, {
    pointerEvents: 'auto',
    autoAlpha: 1,
    visibility: 'seen',
  });

  tl.to(this.transitionOverlay, {
    '--clip': `polygon(0 ${50 - this.percentageVerticalClip}%, 100% ${50 - this.percentageVerticalClip}%, 100% ${50 + this.percentageVerticalClip}%, 0 ${50 + this.percentageVerticalClip}%)`,
  });

  tl.to(this.transitionOverlay, {
    "--clip": "polygon(0% 0%, 100% 0%, 100% 100%, 0% 100%)",
  });

  return new Promise((resolve) => {
    tl.name(() => {
      this.motionTexts.destroy(); // Destroy movement textual content for the present container
      resolve();
    });
  });
},
On the depart hook we make the overlay seen and allow pointer occasions so it will probably sit above the web page.
Then we animate the CSS variable --clip which controls the clip-path of the overlay.
The animation occurs in two steps:
- The skinny horizontal strip expands throughout the complete width of the display screen.
- Then it grows vertically till it covers your complete viewport.
At this level the overlay totally covers the web page, hiding the previous content material.
after: () => {
  const tl = gsap.timeline({
    defaults: {
      period: 1,
      ease: "hop",
    },
    onComplete: () => {

      if (this.splitTitleDestination) {
        this.splitTitleDestination.revert();
        this.splitTitleDestination = null;
      }

      gsap.set(this.transitionOverlay, {
        pointerEvents: "none",
        autoAlpha: 0,
        visibility: "hidden",
      });

      tl.kill();
    },
  });

  tl.to(this.splitTitleDestination.phrases, {
    yPercent: -120,
    period: 0.5,
    stagger: {
      quantity: 0.25,
    },
    ease: "elastic.in(1, 1)",
  });

  tl.to(
    this.transitionOverlay,
    {
      "--clip": "polygon(0% 0%, 100% 0%, 100% 0%, 0% 0%)",
      onStart: () => {
         this.motionTexts.init(); // Initialize movement textual content for the following container
         this.motionTexts.animationIn(); // Animate cut up textual content for subsequent container
      },
    },
    "<+0.25",
  );

  return new Promise((resolve) => {
    tl.name(() => {
      this.barbaWrapper.classList.take away("is__transitioning");
      this.transitionOverlay.classList.take away("team__transition");
      resolve();
    });
  });
},
Right here, we animate the title phrases upward utilizing a staggered animation. Every phrase strikes up barely one after one other, making a small movement impact.
On the similar time, the overlay collapses again to the highest utilizing the clip-path animation, revealing the brand new web page beneath.
When the animation finishes we:
- revert the SplitText occasion to revive the unique DOM construction
- cover the overlay once more
Here's a preview for the fourth transition:
Observe that within the demo, we’re simply including a easy textual content, however you possibly can uncomment the road within the code the place we really get the title of the following web page.
Fifth Transition
For the fifth transition we create a draw SVG animation impressed by the web page transition seen on https://truus.co/.
Earlier than beginning the animation, we first have to create a component that might be used for this impact utilizing SVG.
Setup transition draw svg aspect
The aspect
Styling aspect
.transition__svg__wrapper {
  place: fastened;
  inset: 0;
  overflow: hidden;
  z-index: 100;
  visibility: hidden;
  pointer-events: none;
  width: 100%;
  top: 100vh;
  will-change: visibility, pointer-events;
}

.svg__transition {
  width: 100%;
  top: 100%;
  show: grid;
  place-items: middle;
}

.svg__transition svg {
  show: block;
  width: 125%;
  top: auto;
  aspect-ratio: 1;
}

.svg__transition svg path {
  stroke: var(--archive-overlay);
}
We be sure that the SVG is positioned within the middle and occupies all of the width. Due to the form of our path, we add a little bit additional width to ensure it fills all the world once we fill the stroke and draw it.
After creating the aspect for the draw SVG transition, we have to register the DrawSVGPlugin first.
import DrawSVGPlugin from "gsap/DrawSVGPlugin";

gsap.registerPlugin(SplitText, CustomEase, MorphSVGPlugin, DrawSVGPlugin);
{
title: "example-5-transition",
to: {
namespace: ["archive"],
},
earlier than: () => {},
enter: () => {},
depart: () => {},
}earlier than: () => {
this.barbaWrapper.classList.add("is__transitioning");
},Within the earlier than operate, we merely add the is__transitioning class to the wrapper to disable all anchor interactions throughout the transition.
depart: () => {
  const tl = gsap.timeline({
    defaults: {
      period: 1.4,
      ease: 'sine.inOut',
    },
    onComplete: () => tl.kill(),
  });

  gsap.set('.transition__svg__wrapper', {
    pointerEvents: 'auto',
    autoAlpha: 1,
    visibility: 'seen',
  });

  gsap.set('.svg__transition svg path', {
    drawSVG: '0% 0%',
    attr: { 'stroke-width': 100 },
    opacity: 0,
  });

  tl.to('.svg__transition svg path', {
    opacity: 1,
    period: 0.5,
  });

  tl.to(
    '.svg__transition svg path',
    {
      drawSVG: '0% 100%',
    },
    '<',
  );

  tl.to(
    '.svg__transition svg path',
    {
      attr: { 'stroke-width': 400 },
      ease: 'sine.inOut',
    },
    '<+=0.18',
  );

  return new Promise((resolve) => {
    tl.name(() => {
      this.motionTexts.destroy();
      resolve();
    });
  });
},
Subsequent, within the depart operate, we animate a number of parts such because the SVG overlay and the SVG path utilizing the DrawSVGPlugin. First, we set the preliminary state of the trail utilizing drawSVG: "0% 0%", which suggests the animation begins from the very starting of the trail. Then we animate it to drawSVG: "0% 100%", which pulls the trail from the beginning level to the tip level. On the similar time, we additionally animate the stroke-width of the trail so it grows and finally fills your complete display screen.
after: () => {
  const tl = gsap.timeline({
    defaults: {
      period: 1,
      ease: 'sine.inOut',
    },
    onComplete: () => {
      gsap.set('.transition__svg__wrapper', {
        pointerEvents: 'none',
        autoAlpha: 0,
        visibility: 'hidden',
      });

      gsap.set('.svg__transition svg path', {
        drawSVG: '0% 0%',
        attr: { 'stroke-width': 100 },
      });

      tl.kill();
    },
  });

  tl.to('.svg__transition svg path', {
    attr: { 'stroke-width': 100 },
  });

  tl.to(
    '.svg__transition svg path',
    {
      drawSVG: '100% 100%',
    },
    '<+=0.45',
  );

  return new Promise((resolve) => {
    tl.name(() => {
      this.barbaWrapper.classList.take away('is__transitioning');
      resolve();
    });
  });
},
Lastly, within the after operate, we animate the trail utilizing drawSVG: "100% 100%". This creates an impact the place the trail seems to erase itself from begin to finish. Together with that, we additionally animate the stroke-width again to its default worth.
Right here is the preview for our fifth transition:
Sixth Transition
This final transition is predicated on https://www.leandra-isler.ch/.
{
  title: "example-6-transition",
  to: {
    namespace: ["contact"],
  },
  earlier than: () => {},
  enter: () => {},
  after: () => {},
  sync: true
}
Once more, we use sync mode in Barba.js.
The idea is much like the third transition as a result of it additionally makes use of an overlay impact. Nevertheless, as an alternative of making a separate overlay aspect, the overlay is created utilizing a pseudo aspect from the subsequent container.
The concept is to animate the clip-path of the following container so it expands into view. On the similar time, we additionally animate the clip-path of the pseudo aspect. This makes it appear like a curtain being lifted.
Styling the Pseudo-Component
.app__wrapper.contact__transition::earlier than {
  content material: "";
  place: absolute;
  high: 0;
  left: 0;
  width: 100%;
  top: 100%;
  z-index: 100;
  will-change: clip-path;
  background-color: var(--contact-overlay);
  clip-path: var(--clip, inset(0 0 100% 0));
}
earlier than: (information) => {
this.barbaWrapper.classList.add("is__transitioning");
information.subsequent.container.classList.add("contact__transition");
gsap.set(information.subsequent.container, {
place: "fastened",
inset: 0,
zIndex: 3,
top: "100vh",
overflow: "hidden",
clipPath: "polygon(15% 75%, 85% 75%, 85% 75%, 15% 75%)",
"--clip": "inset(0 0 0% 0)",
});
},Within the earlier than operate, we add an additional class to the subsequent container referred to as contact__transition. This class is used to manage the kinds of the pseudo aspect.
Inside gsap.set() we will additionally see a CSS variable referred to as "--clip". This variable is used to manage the clip-path of the pseudo aspect, so later we will animate the pseudo aspect utilizing GSAP throughout the transition in Barba.js.
enter: (information) => {
  const tl = gsap.timeline({
    defaults: {
      period: 1.25,
      ease: "hop",
    },
    onComplete: () => tl.kill(),
  });

  tl.to(information.subsequent.container, {
    clipPath: "polygon(0% 100%, 100% 100%, 100% 0%, 0% 0%)",
  });

  tl.to(
    information.subsequent.container,
    {
      "--clip": "inset(0 0 100% 0)",
    },
    "<+=0.285",
  );

 tl.name(() => {
   this.motionTexts.destroy(); // Destroy movement textual content for the present container
   this.motionTexts.init(information.subsequent.container); // Initialize movement textual content for the following container
   this.motionTexts.animationIn(); // Animate cut up textual content for subsequent container
  }, null, '<+=0.385');

  return new Promise((resolve) => {
    tl.name(() => {
      resolve();
    });
  });
},
Right here we animate the subsequent container utilizing a GSAP timeline.
First we animate the clip-path polygon so the following container expands till it fills your complete display screen.
Nearly on the similar time we additionally animate the CSS variable --clip. This variable controls the clip-path of the pseudo aspect inside the following container, creating an extra overlay animation.
after: (information) => {
  this.barbaWrapper.classList.take away('is__transitioning');

  information.subsequent.container.classList.take away('contact__transition');

  gsap.set(information.subsequent.container, {
    clearProps: 'all',
  }); // Clear all inline GSAP kinds to keep away from conflicts with new animations

}
In spite of everything animations end, the after operate performs a small cleanup.
Right here we take away the inline kinds from the subsequent container utilizing clearProps from GSAP. We additionally take away the additional class contact__transition that was beforehand added within the earlier than hook.
Right here the preview for our final transition:
Wrapping up
That’s the complete setup for constructing web page transitions in Astro with Barba.js and GSAP. By combining Astro’s component-driven construction with Barba’s routing layer and GSAP’s animation instruments, you possibly can create transitions that make navigation really feel extra deliberate and linked.
Now it’s your flip to experiment with what you’ve realized and begin constructing web page transitions that really feel like your personal.


