
The Thought Behind the Venture
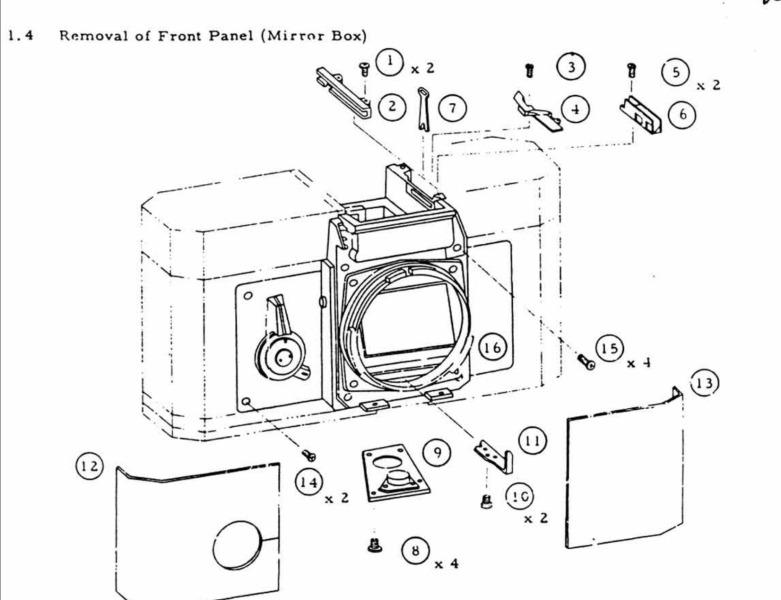
This challenge primarily serves as a technical demo and studying materials. It started once I determined to start out studying Blender. I adopted just a few tutorials, then determined to do a small challenge utilizing it—so I selected to create the Canon F-1 digicam!
After that, I made a decision to export the challenge to Three.js so as to add some cool post-processing shader results. I needed to create a sketch impact much like what I had seen in some restore guides.
After spending just a few hours experimenting with it, I made a decision to combine it into a completely useful web site that includes some cool shaders and 3D results!
On this article, I’m going to stroll via a number of the key options of the positioning and supply a technical breakdown, assuming you have already got a primary or beginner-level understanding of Three.js and shaders.
1. The Edge Detection Shader
Three.js features a built-in edge detection shader referred to as SobelOperatorShader. Mainly, it detects edges based mostly on colour distinction—it attracts a line between two areas with a robust sufficient distinction in colour.
To make my impact work the best way I need, I have to assign a singular colour to every space I need to spotlight on my mannequin. This fashion, Three.js will draw a line round these areas.
Right here’s my mannequin with all of the supplies utilized:
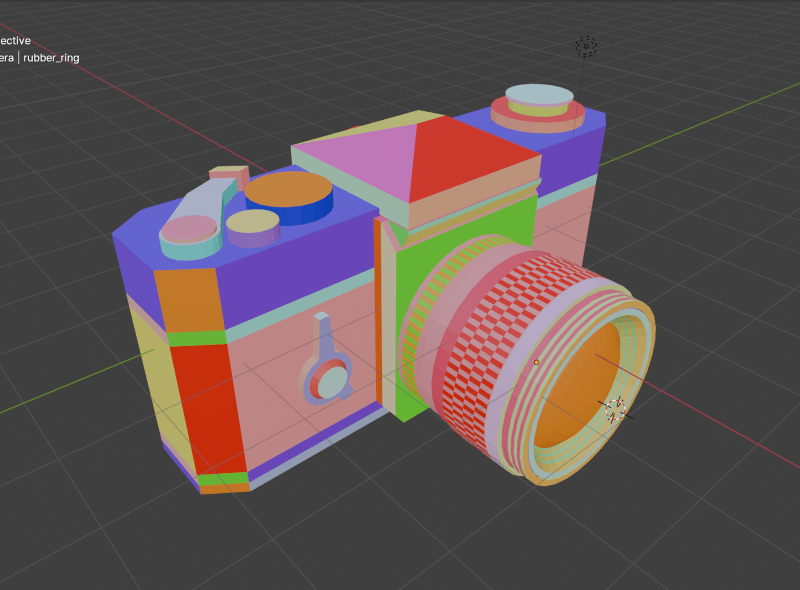
This fashion, Three.js can precisely detect every space I need to spotlight!
As you’ll be able to see, the strains should not all the identical depth—some are white, whereas others are mild grey. It is because, by default, line depth will depend on distinction: edges with decrease distinction seem with lighter strains. To repair this, I manually modified the post-processing shader to make all strains absolutely white, no matter distinction.
The shader might be present in:
node_modules/three/examples/jsm/shaders/SobelOperatorShader.jsI copied the contents of the fragment shader right into a separate file so I may freely modify it.
uniform vec2 decision;
various vec2 vUv;

float sobel(sampler2D tDiffuse,vec2 texel)
{
    // kernel definition (in glsl matrices are stuffed in column-major order)

    const mat3 Gx = mat3( -1, -2, -1, 0, 0, 0, 1, 2, 1 ); // x course kernel
    const mat3 Gy = mat3( -1, 0, 1, -2, 0, 2, -1, 0, 1 ); // y course kernel

    // fetch the 3x3 neighbourhood of a fraction

    // first column

    float tx0y0 = texture2D( tDiffuse, vUv + texel * vec2( -1, -1 ) ).r;
    float tx0y1 = texture2D( tDiffuse, vUv + texel * vec2( -1,  0 ) ).r;
    float tx0y2 = texture2D( tDiffuse, vUv + texel * vec2( -1,  1 ) ).r;

    // second column

    float tx1y0 = texture2D( tDiffuse, vUv + texel * vec2(  0, -1 ) ).r;
    float tx1y1 = texture2D( tDiffuse, vUv + texel * vec2(  0,  0 ) ).r;
    float tx1y2 = texture2D( tDiffuse, vUv + texel * vec2(  0,  1 ) ).r;

    // third column

    float tx2y0 = texture2D( tDiffuse, vUv + texel * vec2(  1, -1 ) ).r;
    float tx2y1 = texture2D( tDiffuse, vUv + texel * vec2(  1,  0 ) ).r;
    float tx2y2 = texture2D( tDiffuse, vUv + texel * vec2(  1,  1 ) ).r;

    // gradient worth in x course

    float valueGx = Gx[0][0] * tx0y0 + Gx[1][0] * tx1y0 + Gx[2][0] * tx2y0 +
        Gx[0][1] * tx0y1 + Gx[1][1] * tx1y1 + Gx[2][1] * tx2y1 +
        Gx[0][2] * tx0y2 + Gx[1][2] * tx1y2 + Gx[2][2] * tx2y2;

    // gradient worth in y course

    float valueGy = Gy[0][0] * tx0y0 + Gy[1][0] * tx1y0 + Gy[2][0] * tx2y0 +
        Gy[0][1] * tx0y1 + Gy[1][1] * tx1y1 + Gy[2][1] * tx2y1 +
        Gy[0][2] * tx0y2 + Gy[1][2] * tx1y2 + Gy[2][2] * tx2y2;

    // magnitute of the full gradient

    float G = sqrt( ( valueGx * valueGx ) + ( valueGy * valueGy ) );

    return G;
}


void principal() {

    vec2 texel = vec2( 1.0 / decision.x, 1.0 / decision.y );

    vec4 t = texture2D(tDiffuse,vUv);

    float G = sobel(t,texel);
    G= G > 0.001 ? 1. : 0.;

    gl_FragColor = vec4(vec3(G),1.0);

    #embody
}
What I’m doing right here is shifting all the sting detection logic into the Sobel perform. Then, I go the tDiffuse texture—which is the composer’s render—to this perform.
This fashion, I can modify the output of the sting detection shader earlier than passing it again to the composer:
float G = sobel(t,texel);
G= G > 0.001 ? 1. : 0.;
G represents the depth of the sting detection. It’s a single worth as a result of the strains are monochrome. G ranges from 0 to 1, the place 0 means full black (no edge detected) and 1 means full white (sturdy distinction detected).
As talked about earlier, this worth will depend on the distinction. What I’m doing within the second line is forcing G to be 1 if it’s above a sure threshold (I selected 0.001, however you can decide a smaller worth if you would like).
This fashion I can get all the perimeters to have the identical depth.
Right here’s how I’m making use of the customized fragment shader to the Sobel Operator shader go:
import { SobelOperatorShader } from "three/addons/shaders/SobelOperatorShader.js"
import { ShaderPass } from "three/addons/postprocessing/ShaderPass.js"


export default class CannonF1 {
    constructor() {
        //....code
    }

    setupPostprocessing()
    {

        SobelOperatorShader.fragmentShader = sobelFragment

        this.effectSobel = new ShaderPass(SobelOperatorShader)
        this.effectSobel.uniforms["resolution"].worth.x =
        window.innerWidth * Math.min(window.devicePixelRatio, 2)
        this.effectSobel.uniforms["resolution"].worth.y =
        window.innerHeight * Math.min(window.devicePixelRatio, 2)

        this.composer.addPass(this.effectSobel)
    }
}
2. The Mesh Spotlight on Hover Impact
Subsequent, let’s check out the lens components part.
That is primarily achieved utilizing a Three.js utility referred to as RenderTarget.
A render goal is a buffer the place the GPU attracts pixels for a scene being rendered off-screen. It’s generally utilized in results like post-processing, the place the rendered picture is processed earlier than being displayed on the display screen.
Mainly, this permits me to render my scene twice per body: as soon as with solely the highlighted mesh, and as soon as with out it.
First I setup the render targets:
/*
  ....Code
*/

createRenderTargets() {
    const sizes = {
      width:
        window.innerWidth * Math.ceil(Math.min(2, window.devicePixelRatio)),
      top:
        window.innerHeight * Math.ceil(Math.min(2, window.devicePixelRatio)),
    }

    this.renderTargetA = new THREE.WebGLRenderTarget(
      sizes.width,
      sizes.top,
      rtParams
    )

    this.renderTargetB = new THREE.WebGLRenderTarget(
      sizes.width,
      sizes.top,
      rtParams
    )
  }

/*
  ...Code
*/
Then, utilizing three.js Raycaster, I can retrieve the uuid of the mesh that’s being hoverer on:
onMouseMove(occasion: MouseEvent) {
    this.mouse.x = (occasion.clientX / window.innerWidth) * 2 - 1
    this.mouse.y = -(occasion.clientY / window.innerHeight) * 2 + 1

    this.raycaster.setFromCamera(this.mouse, this.digicam)
    const intersects = this.raycaster.intersectObjects(this.scene.youngsters)
    const goal = intersects[0]

    if (goal && "materials" in goal.object) {
      const targetMesh = intersects[0].object as THREE.Mesh
      this.cannonF1?.onSelectMesh(targetMesh.uuid)
    } else {
      this.cannonF1?.onSelectMesh()
    }
  }
Within the onSelectMesh methodology, I set the worth of this.selectedMeshName to the identify of the mesh group that comprises the goal mesh from the Raycaster (I’m utilizing names to check with teams of meshes).
This fashion, in my render loop, I can create two distinct renders:
- One render (
renderTargetA) with all of the meshes besides the hovered mesh - One other render (
renderTargetB) with solely the hovered mesh
render() {
    // Render renderTargetA
    this.modelChildren.forEach((mesh) => {
      if (this.mesheUuidToName[mesh.uuid] === this.selectedMeshName) {
        mesh.seen = false
      } else {
        mesh.seen = true
      }
    })

    this.renderer.setRenderTarget(this.renderTargetA)
    this.renderer.render(this.scene, this.digicam)

    // Render renderTargetB
    this.modelChildren.forEach((mesh) => {
      if (this.mesheUuidToName[mesh.uuid] === this.selectedMeshName) {
        mesh.seen = true
      } else {
        mesh.seen = false
      }
    })
    if (this.targetedMesh) {
      this.targetedMesh.youngsters.forEach((baby) => {
        baby.seen = true
      })
    }

    this.renderer.setRenderTarget(this.renderTargetB)
    this.renderer.render(this.scene, this.digicam)

    this.modelChildren.forEach((mesh) => {
      mesh.seen = false
    })

    this.effectSobel.uniforms.tDiffuse1.worth = this.renderTargetA.texture
    this.effectSobel.uniforms.tDiffuse2.worth = this.renderTargetB.texture

    this.renderer.setRenderTarget(null)
  }
That is what the renderTargetA render seems to be like:
…and renderTargetB:
As you’ll be able to see, I’m sending each renders as texture uniforms to the effectSobel shader. The post-processing shader then “merges” these two renders right into a single output.
At this level, now we have two renders of the scene, and the post-processing shader must determine which one to show. Initially, I considered merely combining them by including the 2 textures collectively, however that didn’t produce the proper outcome:
What I wanted was a strategy to conceal the pixels of 1 render when they’re “coated” by pixels from one other render.
To realize this, I used the gap of every vertex from the digicam. This meant I needed to undergo all of the meshes within the mannequin and modify their supplies. Nevertheless, for the reason that mesh colours are vital for the sting detection impact, I couldn’t change their colours.
As an alternative, I used the alpha channel of every particular person vertex to set the gap from the digicam.
#embody

various vec3 vPosition;
uniform vec3 uColor;

float normalizeRange(float worth, float oldMin, float oldMax, float newMin, float newMax) {
    float normalized = (worth - oldMin) / (oldMax - oldMin);

    return newMin + (newMax - newMin) * normalized;
}

void principal()
{
    float dist = distance(vPosition,cameraPosition);

    float l = luminance( uColor );

    gl_FragColor=vec4(vec3(l),normalizeRange(dist,0.,20.,0.,1.));

    #embody
}
Right here’s a proof of this shader:
- First, the
luminanceperform is a built-in Three.js shader utility imported from the - The
uColorworth represents the preliminary colour of the mesh. - The
distworth calculates the gap between the vertex place (handed from the vertex shader through a various) and the digicam, utilizing the built-incameraPositionvariable in Three.js shaders. - Lastly, I go this distance via the alpha channel. For the reason that alpha worth can’t exceed 1, I take advantage of a normalized model of the gap.
And right here is the up to date logic for the postprocessing shader:
uniform sampler2D tDiffuse;
uniform sampler2D tDiffuse1;
uniform sampler2D tDiffuse2;
uniform vec2 decision;
various vec2 vUv;

float sobel(sampler2D tDiffuse,vec2 texel)
{
    //sobel operator
}


void principal() {

    vec2 texel = vec2( 1.0 / decision.x, 1.0 / decision.y );

    vec4 t = texture2D(tDiffuse,vUv);

    vec4 t1 = texture2D(tDiffuse1,vUv);
    vec4 t2 = texture2D(tDiffuse2,vUv);

    if(t1.a==0.)
    {
        t1.a = 1.;
    }
    if(t2.a==0.)
    {
        t2.a = 1.;
    }


    float G = sobel(tDiffuse1,texel);
    G= G > 0.001 ? 1. : 0.;
    float Gs = sobel(tDiffuse2,texel);
    Gs = Gs > 0.001 ? 1. : 0.;

    vec4 s1 = vec4(vec3(G),1.);

    vec4 s2 = vec4(vec3(Gs),1.);

    vec4 sobelTexture = vec4(vec3(0.),1.);


    if(t1.a>t2.a)
    {
        sobelTexture = s2;
    }
    else{
        sobelTexture = s1;
    }


    gl_FragColor = sobelTexture;

    #embody
}
Now that the alpha channel of the textures comprises the gap to the digicam, I can merely evaluate them and show the render which have the nearer vertices to the digicam.
3. The Movie Roll Impact
Subsequent is that this movie roll part that strikes and twist on scroll.
This impact is achieved utilizing solely shaders, the part is a single airplane part with a shader materials.
All the information is shipped to the shader via uniforms:
export default class Movie {
  constructor() {
    //...code
  }

  createGeometry() {
    this.geometry = new THREE.PlaneGeometry(
      60,
      2,
      100,
      10
    )
  }

  createMaterial() {
    this.materials = new THREE.ShaderMaterial({
      vertexShader,
      fragmentShader,
      facet: THREE.DoubleSide,
      clear: true,
      depthWrite: false,
      mixing: THREE.CustomBlending,
      blendEquation: THREE.MaxEquation,
      blendSrc: THREE.SrcAlphaFactor,
      blendDst: THREE.OneMinusSrcAlphaFactor,
      uniforms: {
        uPlaneWidth: new THREE.Uniform(this.geometry.parameters.width),
        uRadius: new THREE.Uniform(2),
        uXZfreq: new THREE.Uniform(3.525),
        uYfreq: new THREE.Uniform(2.155),
        uOffset: new THREE.Uniform(0),
        uAlphaMap: new THREE.Uniform(
          window.preloader.loadTexture(
            "./alpha-map.jpg",
            "film-alpha-map",
            (texture) => {
              texture.wrapS = THREE.RepeatWrapping
              const { width, top } = texture.picture
              this.materials.uniforms.uAlphaMapResolution.worth =
                new THREE.Vector2(width, top)
            }
          )
        ),
        //uImages: new THREE.Uniform(new THREE.Vector4()),
        uImages: new THREE.Uniform(
          window.preloader.loadTexture(
            "/film-texture.png",
            "film-image-texture",
            (tex) => {
              tex.wrapS = THREE.RepeatWrapping
            }
          )
        ),
        uRepeatFactor: new THREE.Uniform(this.repeatFactor),
        uImagesCount: new THREE.Uniform(this.photos.size * this.repeatFactor),
        uAlphaMapResolution: new THREE.Uniform(new THREE.Vector2()),
        uFilmColor: new THREE.Uniform(window.colours.orange1),
      },
    })
  }

  createMesh() {
    this.mesh = new THREE.Mesh(this.geometry, this.materials)
    this.scene.add(this.mesh)
  }
}
The principle vertex shader uniforms are:
-
uRadiusis the radius of the cylinder form -
uXZfreqis the frequency of the twists on the (X,Z) airplane uYfreqis a cylinder top issueuOffsetis the vertical offset of the roll if you scroll up and down
Right here is how they’re used within the vertex shader:
#outline PI 3.14159265359

uniform float uPlaneWidth;
uniform float uXZfreq;
uniform float uYfreq;
various vec2 vUv;
uniform float uOffset;
various vec3 vPosition;
uniform float uRadius;

void principal()
{
    vec3 np = place;
    float theta = -(PI*np.x)/(uPlaneWidth*0.5);


    np.x=cos(uXZfreq*theta+uOffset)*uRadius;
    np.y+=theta*uYfreq;
    np.z=sin(uXZfreq*theta+uOffset)*uRadius;

    vec4 modelPosition = modelMatrix * vec4(np, 1.0);


    vec4 viewPosition = viewMatrix * modelPosition;
    vec4 projectedPosition = projectionMatrix * viewPosition;
    gl_Position = projectedPosition;


    vUv=uv;
    vPosition=np;
}
As you’ll be able to see they’re used to switch the preliminary place attribute to provide it the form of a cylinder. the modified place’s X Y and Z components are utilizing uOffset of their frequency. this uniform is linked to a Scrolltrigger timeline that can give the twist on scroll impact.
const tl = gsap.timeline({
  scrollTrigger: {
    set off: this.part,
    begin: "prime backside",
    finish: "backside prime",
    scrub: true,
    invalidateOnRefresh: true,
  },
})

tl.to(
  this.materials.uniforms.uOffset,
  {
    worth: 10,
    period: 1,
  },
  0
)
Conclusion
That’s it for essentially the most half! Don’t really feel annoyed for those who don’t perceive the whole lot immediately—I usually obtained caught for days on sure components and didn’t know each technical element earlier than I began constructing.
I discovered a lot from this challenge, and I hope you’ll discover it simply as helpful!
Thanks for studying, and because of Codrops for that includes me once more!


![How creators and entrepreneurs are utilizing AI to hurry up & succeed [data]](https://blog.aimactgrow.com/wp-content/uploads/2025/06/Untitled20design-Apr-07-2023-08-24-35-4586-PM-120x86.png)


