
Rendering textual content in WebGL opens up a complete new world of distinctive visible results and artistic potentialities which might be typically
not possible to attain with conventional HTML, CSS and JavaScript alone. By the tip of this tutorial, we’ll have created
WebGL-rendered textual content components that completely mimic the underlying HTML construction. Since we’ll be taking an HTML-first
method, will probably be responsive, Search engine optimisation-friendly and accessible. We’ll be doing each step manually so that you’ll achieve a
strong understanding of the ideas behind merging HTML and WebGL, and text-specific stuff like easy methods to translate CSS
types into the 3D world.
We’ll be creating the under demo:
We’ll begin off with a typical styled HTML setup. Then we’ll recreate the textual content components we’ve inside a 3D world.
From there, we’ll place, scale and make the textual content responsive with the 3D area. Subsequent, we’ll replicate the “masks
reveal impact” in WebGL. And at last, we’ll apply some scroll-driven submit processing results to the scene.
Beneath are the core steps we’ll observe to attain the ultimate outcome:
- Create the textual content as a HTML factor and elegance it frequently utilizing CSS
- Create a 3D world and recreate the textual content factor inside it
- Merge the 3D and 2D world, in order that we will fashion the 3D textual content by utilizing our viewport’s dimensions
- Sync the important thing properties like place, measurement and font — from the HTML factor to the WebGL textual content factor
- Cover the unique HTML factor
- Be left with solely the 3D textual content, absolutely styled and positioned in sync with the hidden HTML construction
- Apply animations and post-processing to boost our 3D scene
Requirements and Stipulations
We’ll be utilizing the Three.js library to create the 3D world, so it’s best to already be aware of its fundamentals. For the
creation of textual content meshes, we’ll be utilizing the
troika-three-text
library, however you don’t should be aware of the library beforehand. When you’ve used HTML, CSS and JavaScript, know
the fundamentals of Three.JS,
you’re good to go.
Let’s get began.
1. Creating the Common HTML and Making it Responsive
Earlier than diving into the WebGL and Three.js implementation, we first have to create the HTML construction that we’ll later
mimic within the 3D world. I’ve arrange a quite simple web page with some fast responsive content material — yow will discover the
setup content material
within the demo repository underneath
index.html
and
types.css
.
HTML
:
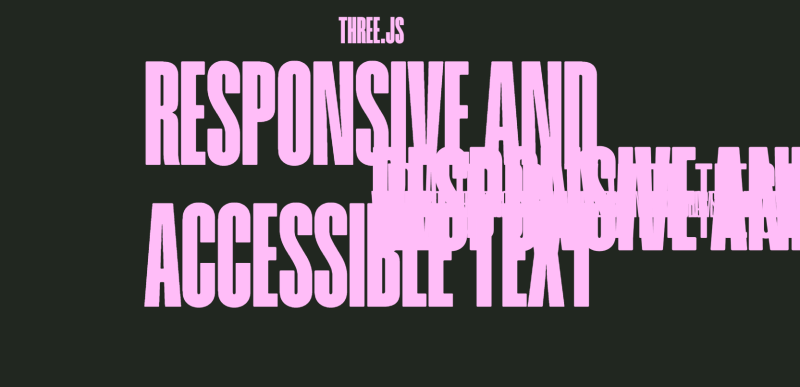
      THREE.JS

        RESPONSIVE AND ACCESSIBLE TEXT


        THIS TEXT IS STYLED TO LOOK LIKE A TYPICAL BLOCK OF TEXT ON A STANDARD
        WEBSITE. BUT UNDER THE SURFACE, IT'S BEING RENDERED WITH WEBGL INSTEAD
        OF TRADITIONAL HTML.


        THIS OPENS THE DOOR TO CUSTOM SHADER EFFECTS AND INTERACTIONS THAT GO
        BEYOND WHAT'S POSSIBLE WITH TRADITIONAL HTML.


        WE KEEP THE UNDERYLING HTML STRUCTURE PRESENT IN THE DOM. RATHER THAN
        CREATING MESHES DIRECTLY IN THREE.JS, THE SCENE IS BUILT BY READING FROM
        THE EXISTING HTML CONTENT. THIS WAY, SCREEN READERS, SEARCH ENGINES, AND
        OTHER TOOLS CAN STILL INTERPRET THE PAGE AS EXPECTED.
types.css
:root {
  --clr-text: #fdcdf9;
  --clr-selection: rgba(255, 156, 245, 0.3);
  --clr-background: #212720;
}

@font-face {
  font-family: "Humane";
  src: url("/fonts/Humane-Black.ttf") format("truetype");
  font-weight: 900;
  font-style: regular;
  font-display: swap;
}

@font-face {
  font-family: "Humane";
  src: url("/fonts/Humane-Daring.ttf") format("truetype");
  font-weight: 700;
  font-style: regular;
  font-display: swap;
}

@font-face {
  font-family: "Humane";
  src: url("/fonts/Humane-ExtraBold.ttf") format("truetype");
  font-weight: 800;
  font-style: regular;
  font-display: swap;
}

@font-face {
  font-family: "Humane";
  src: url("/fonts/Humane-ExtraLight.ttf") format("truetype");
  font-weight: 200;
  font-style: regular;
  font-display: swap;
}

@font-face {
  font-family: "Humane";
  src: url("/fonts/Humane-Gentle.ttf") format("truetype");
  font-weight: 300;
  font-style: regular;
  font-display: swap;
}

@font-face {
  font-family: "Humane";
  src: url("/fonts/Humane-Medium.ttf") format("truetype");
  font-weight: 500;
  font-style: regular;
  font-display: swap;
}

@font-face {
  font-family: "Humane";
  src: url("/fonts/Humane-Common.ttf") format("truetype");
  font-weight: 400;
  font-style: regular;
  font-display: swap;
}

@font-face {
  font-family: "Humane";
  src: url("/fonts/Humane-SemiBold.ttf") format("truetype");
  font-weight: 600;
  font-style: regular;
  font-display: swap;
}

@font-face {
  font-family: "Humane";
  src: url("/fonts/Humane-Skinny.ttf") format("truetype");
  font-weight: 100;
  font-style: regular;
  font-display: swap;
}

physique {
  background: var(--clr-background);
}

canvas {
  place: fastened;
  prime: 0;
  left: 0;
  width: 100vw;
  peak: 100vh;
  pointer-events: none;
}

::choice {
  background-color: var(--clr-selection);
  shade: var(--clr-text);
}

::-moz-selection {
  background-color: var(--clr-selection);
  shade: var(--clr-text);
}

.text__1,
.text__2,
.text__3 {
  shade: var(--clr-text);
  text-align: heart;
  margin-block-start: 0;
  margin-block-end: 0;
}

.content material {
  width: 100%;
  font-family: Humane;
  font-size: 0.825vw;

  @media (max-width: 768px) {
    font-size: 2vw;
  }
}
.container {
  show: flex;
  flex-direction: column;
  align-items: heart;

  width: 70em;
  hole: 17.6em;
  padding: 6em 0;

  @media (max-width: 768px) {
    width: 100%;
  }
}

.container part {
  show: flex;
  flex-direction: column;
  align-items: heart;
  peak: auto;
}

.section__main__content {
  hole: 5.6em;
}

.text__1 {
  font-size: 19.4em;
  font-weight: 700;
  max-width: 45em;

  @media (max-width: 768px) {
    font-size: 13.979em;
  }
}

.text__2 {
  font-size: 4.9em;
  max-width: 7.6em;
  letter-spacing: 0.01em;
}

.text__3 {
  font-size: 13.979em;
  max-width: 2.4em;
}
A Few Key Notes concerning the Setup
-
The
factor is ready to cowl your complete display screen, fastened in place behind the primary content material. We would like a full display screen canvas
masking your complete display screen behind our predominant content material always. -
All textual content components supposed for WebGL rendering are marked with data-animation=”webgl-text” for readability and simple
choice once we start scripting.
The aim of this setup is to operate because the “placeholder” that we will mimic in our 3D implementation. So, it’s
vital to
place and elegance your textual content at this stage
to make sure it matches the ultimate sizing and positioning that you simply wish to obtain. All textual content formatting properties like
font-size, letter-spacing, line-height and so forth. are the properties you wish to deal with, as a result of we’ll later learn these
computed types instantly from the DOM in the course of the WebGL part. Shade is optionally available right here, as we will deal with textual content coloring
later with shaders inside WebGL.
That’s it for the HTML and CSS setup! It’s all we want for the inspiration to maneuver onto our JavaScript and WebGL
implementation.
2. Preliminary 3D World Setup
Let’s transfer onto the JavaScript and WebGL implementation. I’ll be utilizing TypeScript, however you possibly can simply observe alongside
with vanilla JavaScript if you happen to choose. I’m assuming you’re already aware of the fundamentals of Three.js, so I’ll focus
on explaining the high-level setup relatively than masking each element.
Beneath is the starter TypeScript and Three.JS base that I’ll be utilizing for this demo.
// predominant.ts

import Commons from "./courses/Commons";
import * as THREE from "three";

/**
 * Fundamental entry-point.
 * Creates Commons and Scenes
 * Begins the replace loop
 * Finally creates Postprocessing and Texts.
  */
class App {
  non-public commons!: Commons;

  scene!: THREE.Scene;

  constructor() {
    doc.addEventListener("DOMContentLoaded", async () => {
      await doc.fonts.prepared; // Essential to attend for fonts to load when animating any texts.

      this.commons = Commons.getInstance();
      this.commons.init();

      this.createScene();

      this.addEventListeners();

      this.replace();
    });
  }

  non-public createScene() {
    this.scene = new THREE.Scene();
  }

  /**
   * The principle loop handler of the App
   * The replace operate to be known as on every body of the browser.
   * Calls replace on all different components of the app
   */
  non-public replace() {
    this.commons.replace();

    this.commons.renderer.render(this.scene, this.commons.digital camera);

    window.requestAnimationFrame(this.replace.bind(this));
  }

  non-public addEventListeners() {
    window.addEventListener("resize", this.onResize.bind(this));
  }

  non-public onResize() {
    this.commons.onResize();
  }
}

export default new App();
// Commons.ts

import { PerspectiveCamera, WebGLRenderer, Clock } from "three";

import Lenis from "lenis";

export interface Display {
  width: quantity;
  peak: quantity;
  side: quantity;
}

export interface Sizes {
  display screen: Display;
  pixelRatio: quantity
}

/**
 * Singleton class for Widespread stuff.
 * Digital camera
 * Renderer
 * Lenis
 * Time
 */
export default class Commons {
  non-public constructor() {}

  non-public static occasion: Commons;

  lenis!: Lenis;
  digital camera!: PerspectiveCamera;
  renderer!: WebGLRenderer;

  non-public time: Clock = new Clock();
  elapsedTime!: quantity;

  sizes: Sizes = {
    display screen: {
      width: window.innerWidth,
      peak: window.innerHeight,
      side: window.innerWidth / window.innerHeight,
    },
    pixelRatio: this.getPixelRatio(),
  };

  non-public distanceFromCamera: quantity = 1000;

  /**
   * Operate to be known as to both create Commons Singleton occasion, or to return present one.
   * TODO AFTER: Name cases init() operate.
   * @returns Commons Singleton Occasion.
   */
  static getInstance() {
    if (this.occasion) return this.occasion;

    this.occasion = new Commons();
    return this.occasion;
  }

  /**
   * Initializes all-things Commons. To be known as after occasion is ready.
   */
  init() {
    this.createLenis();
    this.createCamera();
    this.createRenderer();
  }

  /**
   * Creating Lenis occasion.
   * Units autoRaf to true so we do not have to manually replace Lenis on each body.
   * Resets doable saved scroll place.
   */
  non-public createLenis() {
    this.lenis = new Lenis({ autoRaf: true, period: 2 });
  }

  non-public createCamera() {
    this.digital camera = new PerspectiveCamera(
      70,
      this.sizes.display screen.side,
      200,
      2000
    );
    this.digital camera.place.z = this.distanceFromCamera;
    this.digital camera.updateProjectionMatrix();
  }

  /**
   * createRenderer(): Creates the frequent WebGLRenderer for use.
   */
  non-public createRenderer() {
    this.renderer = new WebGLRenderer({
      alpha: true, // Units scene background to clear, so our physique background defines the background shade
    });

    this.renderer.setSize(this.sizes.display screen.width, this.sizes.display screen.peak);

    this.renderer.setPixelRatio(this.sizes.pixelRatio);

	  // Creating canvas factor and appending to physique factor.
    doc.physique.appendChild(this.renderer.domElement);
  }

  /**
   * Single supply of reality to get pixelRatio.
   */
  getPixelRatio() {
    return Math.min(window.devicePixelRatio, 2);
  }

  /**
   * Resize handler operate is known as from the entry-point (predominant.ts)
   * Updates the Widespread display screen dimensions.
   * Updates the renderer.
   * Updates the digital camera.
   */
  onResize() {
    this.sizes.display screen = {
      width: window.innerWidth,
      peak: window.innerHeight,
      side: window.innerWidth / window.innerHeight,
    };
    this.sizes.pixelRatio = this.getPixelRatio();

    this.renderer.setSize(this.sizes.display screen.width, this.sizes.display screen.peak);
    this.renderer.setPixelRatio(this.sizes.pixelRatio);

    this.onResizeCamera();
  }

  /**
   * Handler operate that is known as from onResize handler.
   * Updates the attitude digital camera with the brand new adjusted display screen dimensions
   */
  non-public onResizeCamera() {
    this.digital camera.side = this.sizes.display screen.side;
    this.digital camera.updateProjectionMatrix();
  }

  /**
   * Replace operate to be known as from entry-point (predominant.ts)
   */
  replace() {
    this.elapsedTime = this.time.getElapsedTime();
  }
}
A Be aware About Easy Scroll
When syncing HTML and WebGL worlds,
it’s best to use a customized scroll
. It’s because the native scroll in browsers updates the scroll place at irregular intervals and doesn’t thus
assure frame-perfect updates with our requestAnimationFrame loop and our WebGL world, inflicting a
jittery and unsynchronized motion
.
By integrating a customized scroll (Lenis on this case), we guarantee our scroll updates completely match the body updates of
our WebGL world.
Proper now we’re seeing an empty 3D world, constantly being rendered.
We’re solely lacking one factor to get one thing seen in our 3D world: the creation of the textual content components. So let’s
transfer onto creating our WebGLText class subsequent.
3. Creating WebGLText Class and Texts Meshes
For the creation of the textual content meshes, we’ll be utilizing
troika-three-text
library.
npm i troika-three-text
We’ll now create a reusable
WebGLText
class
. This can deal with turning every HTML factor right into a 3D textual content mesh, utilizing Troika and our Three.js scene.
Right here’s the essential setup:
// WebGLText.ts

import Commons from "./Commons";
import * as THREE from "three";

// @ts-ignore
import { Textual content } from "troika-three-text";

interface Props {
  scene: THREE.Scene;
  factor: HTMLElement;
}

export default class WebGLText {
  commons: Commons;

  scene: THREE.Scene;
  factor: HTMLElement;

  computedStyle: CSSStyleDeclaration;
  font!: string; // Path to our .ttf font file.
  bounds!: DOMRect;
  shade!: THREE.Shade;
  materials!: THREE.ShaderMaterial;
  mesh!: Textual content;

  // We assign the right font bard on our factor's font weight from right here
  weightToFontMap: File = {
    "900": "/fonts/Humane-Black.ttf",
    "800": "/fonts/Humane-ExtraBold.ttf",
    "700": "/fonts/Humane-Daring.ttf",
    "600": "/fonts/Humane-SemiBold.ttf",
    "500": "/fonts/Humane-Medium.ttf",
    "400": "/fonts/Humane-Common.ttf",
    "300": "/fonts/Humane-Gentle.ttf",
    "200": "/fonts/Humane-ExtraLight.ttf",
    "100": "/fonts/Humane-Skinny.ttf",
  };

  non-public y: quantity = 0; // Scroll-adjusted bounds.prime

  non-public isVisible: boolean = false;

  constructor({ scene, factor }: Props) {
    this.commons = Commons.getInstance();

    this.scene = scene;
    this.factor = factor;

    this.computedStyle = window.getComputedStyle(this.factor); // Saving preliminary computed fashion.
  }
}
Now we have entry to the
Textual content class
from Troika, which permits us to create textual content meshes components and apply styling to it utilizing acquainted properties like
fontSize, letterSpacing, and font. I’ll cowl the whole lot you’ll want to fashion your textual content responsively on this tutorial,
however I implore you to check out the total documentation and its potentialities
right here
.
Troika doesn’t ship with TypeScript definitions out of the field, so if you happen to’re utilizing TS, you possibly can shortly get round this
by creating a sort declaration file within the root of your challenge. It’s not fairly, but it surely will get the job accomplished whereas
maintaining TypeScript completely happy.
// troika.d.ts

declare module "troika-three-text" {
  const worth: any;
  export default worth;
}
Let’s begin by creating new strategies known as createFont(), createColor() and createMesh().
createFont()
: Selects the suitable .ttf file based mostly on the DOM factor’s font-weight. If a match isn’t discovered, we fall again to
the common weight. Regulate the mapping to match your personal font recordsdata and a number of font households if wanted.
// WebGLText.ts

non-public createFont()
createColor()
: Converts the computed CSS shade right into a THREE.Shade occasion:
// WebGLText.ts

non-public createColor() {
    this.shade = new THREE.Shade(this.computedStyle.shade);
}
createMesh():
Instantiates the textual content mesh and units some primary properties. Copies the textual content’s interior textual content and units it onto the mesh.
Provides the mesh to our Three.JS scene. We anchor the textual content from the left-center to match typical HTML structure
expectations.
// WebGLText.ts
non-public createMesh() {
  this.mesh = new Textual content();

  this.mesh.textual content = this.factor.innerText; // Copying HTML content material over to the mesh
  this.mesh.font = this.font;

  // Anchor the textual content to the left-center (as a substitute of center-center)
  this.mesh.anchorX = "0%";
  this.mesh.anchorY = "50%";

  this.mesh.shade = this.shade;

  this.scene.add(this.mesh);
}
⚠️ When copying textual content contents over to the Mesh, keep away from utilizing innerHTML or textContent and use innerText as a substitute because it
offers probably the most layout-accurate and constant outcomes.
setStaticValues
(): Let’s additionally create a child setStaticValues() methodology which can set the important properties of our textual content mesh based mostly on
the computedStyle.
We units values like font measurement based mostly on computed CSS. We’ll broaden this extra as we sync extra types down the road.
We wish to name all these strategies within the constructor like this:
// WebGLText.ts
 constructor({ scene, factor }: Props) {
  this.commons = Commons.getInstance();

  this.scene = scene;
  this.factor = factor;

  this.computedStyle = window.getComputedStyle(this.factor); // Saving preliminary computed fashion.

  this.createFont();
  this.createColor();
  this.createMesh();
  this.setStaticValues();
}
Instantiating Textual content Components from DOM
Lastly, let’s replace our App class (predominant.ts), and hook this all up by scanning for DOM components with a
data-animation=”webgl-text” attribute — making a WebGLText occasion for every one:
// predominant.ts

texts!: Array;

// ...

non-public createWebGLTexts() {
  const texts = doc.querySelectorAll('[data-animation="webgl-text"]');

  if (texts) {
    this.texts = Array.from(texts).map((el) => {
      const newEl = new WebGLText({
        factor: el as HTMLElement,
        scene: this.scene,
      });

      return newEl;
    });
  }
}
Ensure that to name this methodology within the constructor on initialization. This can populate our scene with styled textual content
meshes based mostly on our DOM content material.
That’s all we have to have our textual content meshes seen, it’s not the prettiest sight to behold, however a minimum of we obtained
the whole lot working:

Subsequent Problem: Display vs. 3D House Mismatch
Though we copy the font measurement instantly from the DOM, the dimensions appears to be like totally different in 3D. That’s as a result of
WebGL models don’t map 1:1 with display screen pixels
, and so they function in several coordinate methods. This mismatch will develop into much more apparent if we begin
positioning and animating components.
To get true visible parity between our DOM components and WebGL textual content, we have to bridge the hole between display screen area and
3D area. Let’s deal with that subsequent so our textual content sizes and positions really match with what we see within the browser.
4. Syncing Dimensions
The foremost drawback when syncing HTML and WebGL dimensions is that issues between them aren’t precisely pixel-perfect.
It’s because the DOM and WebGL don’t “converse the identical models” by default.
- Net browsers work in display screen pixels.
- WebGL makes use of arbitrary models
Our purpose is easy:
💡 Make one unit within the WebGL scene equal one pixel on the display screen.
To attain this, we’ll modify the digital camera’s discipline of view (FOV) in order that seen space by means of the digital camera precisely matches
the size of the browser window in pixels.
So, we’ll create a
syncDimensions()
operate underneath our Commons class, which calculates our digital camera’s discipline of view such that 1 unit within the WebGL scene
corresponds to 1 pixel on the display screen —
at a given distance from the digital camera.
 // Commons.ts
/**
  * Helper operate that is known as upon creation and resize
  * Updates the digital camera's fov based on the brand new dimensions such that the window's pixels match with that of WebGL scene
  */
non-public syncDimensions() {
  this.digital camera.fov =
    2 *
    Math.atan(this.sizes.display screen.peak / 2 / this.distanceFromCamera) *
    (180 / Math.PI);
}
This operate can be known as as soon as once we create the digital camera, and each time that the display screen is resized.
//Commons.ts

non-public createCamera() {
  this.digital camera = new PerspectiveCamera(
    70,
    this.sizes.display screen.side,
    200,
    2000
  );
  this.digital camera.place.z = this.distanceFromCamera;
  this.syncDimensions(); // Syncing dimensions
  this.digital camera.updateProjectionMatrix();
}

// ...

non-public onResizeCamera() {
  this.syncDimensions(); // Syncing dimensions

  this.digital camera.side = this.sizes.display screen.side;
  this.digital camera.updateProjectionMatrix();
}
Let’s break down what’s really occurring right here utilizing the picture under:

We all know:
- The peak of the display screen
- The gap from digital camera (Z)
- The FOV of the digital camera is the vertical angle (fov y within the picture)
So our predominant purpose is to set how huge (vertical angle) we see based on our display screen peak.
As a result of the Z (distance from digital camera) and half of the display screen peak
kinds a proper triangle
(distance + peak), we will clear up for the angle utilizing some primary trigonometry, and compute the FOV utilizing the inverse
tangent (
atan
) of this triangle.
Step-by-step Breakdown of the Components
this.sizes.display screen.peak / 2→ This provides us half the display screen’s pixel peak — the alternative facet of our triangle.
this.distanceFromCamera→ That is the adjoining facet of the triangle — the gap from the digital camera to the 3D scene.
Math.atan(reverse / adjoining)→ Calculates half of the vertical FOV (in radians).
*2→ Since atan solely offers half of the angle, we multiply it by 2 to get the total FOV.
* (180 / Math.PI)→ Converts the angle from radians to levels (Three.js expects levels for PerspectiveCamera’s fov)
So the ultimate formulation comes right down to:
this.digital camera.fov =
  2 *
  Math.atan(this.sizes.display screen.peak / 2 / this.distanceFromCamera) *
  (180 / Math.PI);
That’s all we have to sync our dimensions, and this setup ensures that 1 unit in WebGL = 1 pixel on display screen.
Let’s transfer again to the textual content implementation.
5. Setting Textual content Properties and Positioning
Now that we’ve synced the WebGL scene to our display screen’s pixel dimensions, we will begin mapping HTML types to our 3D
textual content.
If the whole lot’s wired up accurately, it’s best to see that the font measurement of the WebGL-rendered textual content matches the scale of
the underlying HTML, though the positioning remains to be off.
Let’s sync extra styling properties and positioning.
Earlier than we will place the 3D textual content, we have to get the DOM factor’s place and measurement. We’ll create a brand new methodology in
the WebGLText class known as
createBounds()
,
and use the browser’s built-in getBoundingClientRect() methodology:
// WebGLText.ts

non-public createBounds() {
  this.bounds = this.factor.getBoundingClientRect();
  this.y = this.bounds.prime + this.commons.lenis.actualScroll;
}
And name this within the constructor:
  // WebGLText.ts

constructor({ scene, factor }: Props) {
  this.commons = Commons.getInstance();

  this.scene = scene;
  this.factor = factor;

  this.computedStyle = window.getComputedStyle(this.factor); // Saving preliminary computed fashion.

  this.createFont();
  this.createColor();
  this.createBounds(); // Creating bounds
  this.createMesh();
  this.setStaticValues();
}
Subsequent, we’ll pull vital typographic properties from the DOM (computed fashion) and move them to the 3D mesh, in order that
it behaves like our native HTML textual content. (Once more, you possibly can see the total documentation and doable properties of troika
right here
). Beneath I’ve included an important ones.
  // WebGLText.ts

non-public setStaticValues() {
  const { fontSize, letterSpacing, lineHeight, whiteSpace, textAlign } =
    this.computedStyle;

  const fontSizeNum = window.parseFloat(fontSize);

  this.mesh.fontSize = fontSizeNum;

  this.mesh.textAlign = textAlign;

  // Troika defines letter spacing in em's, so we convert to them
  this.mesh.letterSpacing = parseFloat(letterSpacing) / fontSizeNum;

  // Similar with line peak
  this.mesh.lineHeight = parseFloat(lineHeight) / fontSizeNum;

  // Essential to outline maxWidth for the mesh, in order that our textual content does not overflow
  this.mesh.maxWidth = this.bounds.width;

  // Match whiteSpace habits (e.g., 'pre', 'nowrap')
  this.mesh.whiteSpace = whiteSpace;
}
Troika accepts a few of the properties in native em models, so we’ve to transform pixels into em’s by dividing the pixel
values by the font measurement.
Additionally, it’s vital to set a most width (in pixels) to constrain the mesh’s structure — this prevents textual content from
overflowing and ensures correct textual content wrapping.
And at last, let’s create an
replace()
operate to be known as on every body that persistently positions our mesh based on the underlying DOM place.
That is what it appears to be like like:
//WebGLText.ts

replace() {
  this.mesh.place.y =
    -this.y +
    this.commons.lenis.animatedScroll +
    this.commons.sizes.display screen.peak / 2 -
    this.bounds.peak / 2;

  this.mesh.place.x =
    this.bounds.left - this.commons.sizes.display screen.width / 2;
}
Breakdown:
-
this.y
shifts the mesh upward by the factor’s absolute Y offset. -
lenis.animatedScroll
re-applies the stay animated scroll place. - Collectively, they offer the present relative place contained in the viewport.
Since our WebGL coordinate system is centered in the midst of the display screen (Y = 0 is heart), we additionally:
- Add half the display screen peak (to transform from DOM top-left origin to WebGL heart origin)
- Subtract half the textual content peak to vertically heart the textual content
- Subtract half the display screen width
Now, we name this replace operate for every of the textual content cases in our entry-file:
  // predominant.ts

non-public replace() {
  this.commons.replace();

  this.commons.renderer.render(this.scene, this.commons.digital camera);


  if (this.texts) {
    this.texts.forEach((el) => el.replace());
  }

  window.requestAnimationFrame(this.replace.bind(this));
}
And now, the
texts will completely observe DOM counterparts
, even because the consumer scrolls.
Let’s finalize our base textual content class implementation earlier than diving into results:
Resizing
We have to be sure that our WebGL textual content updates accurately on window resize occasions. This implies
recreating the computedStyle, bounds, and static values
every time the window measurement adjustments.
Right here’s the resize occasion handler:
 // WebGLText.ts

onResize() {
  this.computedStyle = window.getComputedStyle(this.factor);
  this.createBounds();
  this.setStaticValues();
}
And, name it within the entry-point for every of the textual content cases:
  // predominant.ts

non-public onResize() {
  this.commons.onResize();

  // Resizing texts
  if (this.texts) {
    this.texts.forEach((el) => el.onResize());
  }
}
As soon as the whole lot is working responsively and completely synced with the DOM, we will lastly
cover the unique HTML textual content by setting it clear
— however we’ll maintain it in place so it’s nonetheless selectable and accessible to the consumer.
// WebGLText.ts

this.createFont();
this.createColor();
this.createBounds();
this.createMesh();
this.setStaticValues();

this.factor.fashion.shade = "clear"; // Cover DOM factor
We should always now have our completely responsive textual content meshes, and the consumer solely sees the rendered WebGL textual content, whereas the DOM
factor stays absolutely intact for accessibility.
Let’s add some results!
6. Including a Customized shader and Replicating Masks Reveal Animations
Troika additionally lets us use customized shader supplies for meshes, giving us the flexibleness to create complicated results past
simply setting colours.
Let’s arrange our preliminary customized shaders:
Fragment Shader:
// textual content.frag

uniform vec3 uColor;
various vec2 vUv;

void predominant() {
  gl_FragColor = vec4(uColor, 1.0); // Making use of our customized shade.
}
The fragment shader defines the colour of the textual content utilizing the uColor uniform.
Vertex Shader:
// textual content.vert
various vec2 vUv;

void predominant() {
  vUv = uv;
  gl_Position = projectionMatrix * modelViewMatrix * vec4(place, 1.0);
}
The vertex shader passes the feel coordinates (uv) to the fragment shader for the textual content rendering.
Shader File Imports utilizing Vite
To deal with shader recordsdata extra simply, we will use the
vite-plugin-glsl
plugin along with Vite to instantly import shader recordsdata like .frag and .vert in code:
npm i vite-plugin-glsl -D// vite.config.ts
import { defineConfig } from "vite";
import glsl from "vite-plugin-glsl";
export default defineConfig({
plugins: [
glsl({
include: [
"**/*.glsl",
"**/*.wgsl",
"**/*.vert",
"**/*.frag",
"**/*.vs",
"**/*.fs",
],
warnDuplicatedImports: true,
defaultExtension: "glsl",
watch: true,
root: "/",
}),
],
});
When you’re utilizing TypeScript, you additionally have to declare the modules for shader recordsdata so TypeScript can perceive easy methods to
import them:
// shaders.d.ts

declare module "*.frag" {
  const worth: string;
  export default worth;
}

declare module "*.vert" {
  const worth: string;
  export default worth;
}

declare module "*.glsl" {
  const worth: string;
  export default worth;
}
Creating Customized Shader Supplies
Let’s now create our customized ShaderMaterial and apply it to our mesh:
// WebGLText.ts

// Importing shaders
import fragmentShader from "../../shaders/textual content/textual content.frag";
import vertexShader from "../../shaders/textual content/textual content.vert";

//...

this.createFont();
this.createColor();
this.createBounds();
this.createMaterial(); // Creating materials
this.createMesh();
this.setStaticValues();

//...

non-public createMaterial() {
   this.materials = new THREE.ShaderMaterial({
     fragmentShader,
     vertexShader
       uniforms: {
       uColor: new THREE.Uniform(this.shade), // Passing our shade to the shader
     },
   });
 }
Within the
createMaterial()
methodology, we outline the
ShaderMaterial
utilizing the imported shaders and move within the uColor uniform, which permits us to dynamically management the colour of the
textual content based mostly on our DOM-element.
And now, as a substitute of setting the colour instantly on the default mesh materials, we apply our new customized materials:
  // WebGLText.ts

non-public createMesh() {
  this.mesh = new Textual content();

  this.mesh.textual content = this.factor.innerText; // All the time use innerText (not innerHTML or textContent).
  this.mesh.font = this.font;

  this.mesh.anchorX = "0%";
  this.mesh.anchorY = "50%";

  this.mesh.materials = this.materials; //Utilizing customized materials as a substitute of shade
}
At this level, we’re utilizing our customized shader materials, however up to now, nothing in our output has modified. Let’s now setup
present and conceal animations utilizing our customized shader, and replicate the masks reveal impact.
Organising Reveal Animations
We’ll create an animation that makes use of a progress uniform (uProgress) to regulate the visibility and reveal progress of
the textual content. The animation can be managed utilizing the movement library.
First, we should set up
movement
and import its
animate
and
inView
capabilities to our WebGLText class.
npm i movement// WebGLText.ts
import { inView, animate } from "movement";
Now, let’s configure our class in order that when the textual content steps into view,
the present() operate is known as
, and when it steps away,
the cover() operate is known as
. These strategies additionally management the present visibility variable
this.isVisible
. These capabilities will management the uProgress variable, and animate it between 0 and 1.
For this, we additionally should setup an addEventListeners() operate:
 // WebGLText.ts

/**
  * Inits visibility monitoring utilizing movement's inView operate.
  * Present is known as when the factor steps into view, and conceal is known as when the factor steps out of view
  */
non-public addEventListeners() {
  inView(this.factor, () => {
    this.present();

    return () => this.cover();
  });
}

present() {
  this.isVisible = true;

  animate(
    this.materials.uniforms.uProgress,
    { worth: 1 },
    { period: 1.8, ease: [0.25, 1, 0.5, 1] }
  );
}

cover() {
  animate(
    this.materials.uniforms.uProgress,
    { worth: 0 },
    { period: 1.8, onComplete: () => (this.isVisible = false) }
  );
}
Simply be sure that to name addEventListeners() in your constructor after establishing the category.
Updating the Shader Materials for Animation
We’ll additionally add two further uniform variables in our materials for the animations:
-
uProgress
: Controls the reveal progress (from 0 to 1). -
uHeight
: Utilized by the vertex shader to calculate vertical place offset.
Up to date
createMaterial()
methodology:
 // WebGLText.ts

non-public createMaterial() {
  this.materials = new THREE.ShaderMaterial({
    fragmentShader,
    vertexShader,
    uniforms: {
      uProgress: new THREE.Uniform(0),
      uHeight: new THREE.Uniform(this.bounds.peak),
      uColor: new THREE.Uniform(this.shade),
    },
  });
}
Because the uHeight depends on bounds, we additionally wish to replace the uniform variable upon resizing:
  // WebGLText.ts

onResize() {
  this.computedStyle = window.getComputedStyle(this.factor);
  this.createBounds();
  this.setStaticValues();
  this.materials.uniforms.uHeight.worth = this.bounds.peak;
}
We now have the textual content class occasion robotically calling present() and conceal(), and animating the uProgress based on
the visibility of our underlying DOM-element.
For efficiency, you may wish to replace the replace() methodology to solely calculate a brand new place when the mesh is
seen:
replace() {
  if (this.isVisible) {
    this.mesh.place.y =
      -this.y +
      this.commons.lenis.animatedScroll +
      this.commons.sizes.display screen.peak / 2 -
      this.bounds.peak / 2;

    this.mesh.place.x =
      this.bounds.left - this.commons.sizes.display screen.width / 2;
  }
}
Masks Reveal Principle and Shader Implementation
Making a masks reveal impact with customized shaders in WebGL is surprisingly easy once we break it down into two
separate actions: one taking place within the fragment shader and the opposite within the vertex shader. You may’ve seen this
impact occur in WebGL on the web page of
Zajno
, for instance.
As a substitute of overcomplicating the idea with complicated masks or enthusiastic about “lifting it up” behind a window (as we do
in conventional HTML), we will consider it as two distinct actions that work collectively.
-
Fragment Shader
: We clip the textual content vertically, revealing it steadily from prime to backside. -
Vertex Shader
: We translate the textual content’s place from the underside to the highest by its peak.
Collectively these two actions create the phantasm of the textual content lifting itself up from behind a masks.
Let’s replace our fragment shader code:
//textual content.frag

uniform float uProgress; // Our progress worth between 0 and 1

uniform vec3 uColor;
various vec2 vUv;

void predominant() {
  // Calculate the reveal threshold (backside to prime reveal)
  float reveal = 1.0 - vUv.y;

  // Discard fragments above the reveal threshold based mostly on progress
  if (reveal > uProgress) discard;

  // Apply the colour to the seen components of the textual content
  gl_FragColor = vec4(uColor, 1.0);
}
- When uProgress is 0, the mesh is absolutely clipped out, and nothing is seen
- When uProgress will increase in the direction of 1, the mesh reveals itself from prime to backside.
For the vertex shader, we will merely move the brand new uniform known as uHeight, which stands for the peak of our
DOM-element (this.bounds.peak), and translate the output vertically based on it and uProgress.
//textual content.vert

uniform float uProgress;
uniform float uHeight; // Whole peak of the mesh handed in from JS

various vec2 vUv;

void predominant() {
  vUv = uv;

  vec3 transformedPosition = place;

  // Push the mesh upward because it reveals
  transformedPosition.y -= uHeight * (1.0 - uProgress);

  gl_Position = projectionMatrix * modelViewMatrix * vec4(transformedPosition, 1.0);
}-
uHeight
: Whole peak of the DOM-element (and mesh), handed in from JS. -
When
uProgress
is
0
, the mesh is absolutely pushed down. -
As
uProgress
reaches
1
, it resolves to its pure place.
Now, we must always have a superbly on-scroll animating scene, the place the texts reveal themselves as in common HTML when
they scroll into view.
To spice issues up, let’s add some scroll-velocity based mostly submit processing results to our scene as the ultimate step!
7. Including Submit-processing
Now that we’ve constructed our animated WebGL textual content with customized shaders and scroll-triggered reveals, we will push the visuals
additional with
post-processing
.
Submit-processing permits us to use full-screen visible results after the scene has been rendered. That is accomplished by
passing the ultimate picture by means of a sequence of customized shader passes.
So, on this last part, we’ll:
- Arrange a PostProcessing class utilizing Three.js’s EffectComposer
- Add a customized RGB shift and wave distortion impact
- Drive the distortion power dynamically utilizing the scroll velocity from our Lenis customized scroll occasion
Making a PostProcessing class with EffectComposer
Let’s create a PostProcessing class that can be intialized from our entry-point, and which can deal with the whole lot
concerning postprocessing utilizing Three.JS’s EffectComposer. Learn extra concerning the EffectComposer class
right here from Three.js’s documentation
. We’ll additionally create new fragment and vertex shaders for the postprocessing class to make use of.
// PostProcessing.ts

import {
  EffectComposer,
  RenderPass,
  ShaderPass,
} from "three/examples/jsm/Addons.js";
import Commons from "./Commons";
import * as THREE from "three";

// Importing postprocessing shaders
import fragmentShader from "../../shaders/postprocessing/postprocessing.frag";
import vertexShader from "../../shaders/postprocessing/postprocessing.vert";

interface Props {
  scene: THREE.Scene;
}

export default class PostProcessing {
  // Scene and utility references
  non-public commons: Commons;
  non-public scene: THREE.Scene;

  non-public composer!: EffectComposer;

  non-public renderPass!: RenderPass;
  non-public shiftPass!: ShaderPass;

  constructor({ scene }: Props) {
    this.commons = Commons.getInstance();

    this.scene = scene;

    this.createComposer();
    this.createPasses();
  }

  non-public createComposer() {
    this.composer = new EffectComposer(this.commons.renderer);
    this.composer.setPixelRatio(this.commons.sizes.pixelRatio);
    this.composer.setSize(
      this.commons.sizes.display screen.width,
      this.commons.sizes.display screen.peak
    );
  }

  non-public createPasses() {
    // Creating Render Cross (last output) first.
    this.renderPass = new RenderPass(this.scene, this.commons.digital camera);
    this.composer.addPass(this.renderPass);

    // Creating Submit-processing shader for wave and RGB-shift impact.
    const shiftShader = {
      uniforms: {
        tDiffuse: { worth: null },      // Default enter from earlier move
        uVelocity: { worth: 0 },        // Scroll velocity enter
        uTime: { worth: 0 },            // Elapsed time for animated distortion
      },
      vertexShader,
      fragmentShader,
    };

    this.shiftPass = new ShaderPass(shiftShader);
    this.composer.addPass(this.shiftPass);
  }

  /**
   * Resize handler for EffectComposer, known as from entry-point.
   */
  onResize() {
    this.composer.setPixelRatio(this.commons.sizes.pixelRatio);
    this.composer.setSize(
      this.commons.sizes.display screen.width,
      this.commons.sizes.display screen.peak
    );
  }

  replace() {
    this.shiftPass.uniforms.uTime.worth = this.commons.elapsedTime;

    this.composer.render();
  }
}
Since we don’t have our postprocessing shaders created but, be sure you create placeholder postprocessing.frag and
postprocessing.vert shaders so the imports don’t fail.
Instance placeholders under:
//postprocessing.frag

uniform sampler2D tDiffuse;
uniform float uVelocity;
uniform float uTime;

various vec2 vUv;

void predominant() {
    gl_FragColor = texture2D(tDiffuse, vUv);
}

//postprocessing.vert
various vec2 vUv;

void predominant() {
    vUv = uv;

    gl_Position = projectionMatrix * modelViewMatrix * vec4(place, 1.0);
}
Breakdown of the PostProcessing class
Constructor:
Initializes the category by storing the supplied scene, grabbing the shared Commons occasion, after which calling
createComposer()
and
createPasses()
.
createComposer():
Units up the EffectComposer with the right pixel ratio and canvas measurement:
- EffectComposer wraps the WebGL renderer and permits chaining of a number of render passes.
- Sized based on present viewport dimensions and pixel ratio
createPasses():
This methodology units up all rendering passes utilized to the scene.
-
RenderPass
: The primary move that merely renders the scene with the primary digital camera as common. -
ShaderPass (shiftPass)
: A customized full-screen shader move that we’ll create and which can create the RGB shift and wavy distortion
results.
replace():
Methodology known as on each body. Updates the uTime uniform so we will animate results over time, and renders the ultimate
post-processed picture utilizing
composer.render()
Initializing Submit-processing
To wire the post-processing system into our present app, we replace our predominant.ts:
  //predominant.ts
non-public postProcessing!: PostProcessing;

//....

constructor() {
  doc.addEventListener("DOMContentLoaded", async () => {
    await doc.fonts.prepared;

    this.commons = Commons.getInstance();
    this.commons.init();

    this.createScene();
    this.createWebGLTexts();
    this.createPostProcessing(); // Creating post-processing
    this.addEventListeners();

    this.replace();
  });
}

// ...

non-public createPostProcessing() {
  this.postProcessing = new PostProcessing({ scene: this.scene });
}

// ...

non-public replace() {
  this.commons.replace();

  if (this.texts) {
    this.texts.forEach((el) => el.replace());
  }

  // Do not want line under as we're rendering the whole lot utilizing EffectComposer.
  // this.commons.renderer.render(this.scene, this.commons.digital camera);

  this.postProcessing.replace(); // Submit-processing class handles rendering of output to any extent further


  window.requestAnimationFrame(this.replace.bind(this));
}


non-public onResize() {
  this.commons.onResize();

  if (this.texts) {
    this.texts.forEach((el) => el.onResize());
  }

  this.postProcessing.onResize(); // Resize post-processing
}
So within the new replace() operate, as a substitute of rendering instantly from there, we now hand off rendering accountability to
the PostProcessing class.
Creating Submit-processing Shader and Wiring Scroll Velocity
We wish to modify the PostProcessing class additional, in order that we replace the postprocessing fragment shader with the
present scroll velocity from Lenis.
For this, I’m including a brand new property lerpedVelocity and lerpFactor, which management the smoothed out velocity. The uncooked
velocity values from lenis may be spiky and sudden, particularly with quick scrolling or scroll jumps. If we move that
uncooked worth instantly right into a shader, it could actually trigger a extremely jittery output.
non-public lerpedVelocity = 0; // Smoothed scroll velocity for post-processing.
non-public lerpFactor = 0.05; // Controls how shortly lerpedVelocity follows the actual velocity

// ...

replace() {
    this.shiftPass.uniforms.uTime.worth = this.commons.elapsedTime;

  // Studying present velocity kind lenis occasion.
  const targetVelocity = this.commons.lenis.velocity;

  // We use the lerped velocity because the precise velocity for the shader, only for a smoother expertise.
  this.lerpedVelocity +=
    (targetVelocity - this.lerpedVelocity) * this.lerpFactor;

  this.shiftPass.uniforms.uVelocity.worth = this.lerpedVelocity;

  this.composer.render();
}
Submit-processing Shaders
For the vertex shader, we will maintain all issues default, we move the feel coordinates to the fragment shader.
//postprocessing.vert

various vec2 vUv;

void predominant() {
  vUv = uv;

  gl_Position = projectionMatrix * modelViewMatrix * vec4(place, 1.0);
}
And for the fragment shader:
//postprocessing.frag

uniform sampler2D tDiffuse;
uniform float uVelocity;
uniform float uTime;

various vec2 vUv;

void predominant() {
  vec2 uv = vUv;

  // Calculating wave distortion based mostly on velocity
  float waveAmplitude = uVelocity * 0.0009;
  float waveFrequency = 4.0 + uVelocity * 0.01;

  // Making use of wave distortion to the UV coordinates
  vec2 waveUv = uv;
  waveUv.x += sin(uv.y * waveFrequency + uTime) * waveAmplitude;
  waveUv.y += sin(uv.x * waveFrequency * 5. + uTime * 0.8) * waveAmplitude;

  // Making use of the RGB shift to the wave-distorted coordinates
  float r = texture2D(tDiffuse, vec2(waveUv.x, waveUv.y + uVelocity * 0.0005)).r;
  vec2 gb = texture2D(tDiffuse, waveUv).gb;

  gl_FragColor = vec4(r, gb, r);
}
Breakdown
// Calculating wave distortion based mostly on velocity
float waveAmplitude = uVelocity * 0.0009;
float waveFrequency = 4.0 + uVelocity * 0.01;
Wave amplitude controls how strongly the wave impact distorts the display screen based on our scroll velocity.
Wave frequency controls how often the waves happen.
Subsequent, we distort the UV-coordinates utilizing sin capabilities and the uTime uniform:
// Making use of wave distortion to the UV coordinates
vec2 waveUv = uv;
waveUv.x += sin(uv.y * waveFrequency + uTime) * waveAmplitude;
waveUv.y += sin(uv.x * waveFrequency * 5. + uTime * 0.8) * waveAmplitude;
The purple channel is offset barely based mostly on the speed, creating the RGB shift impact.
// Making use of the RGB shift to the wave-distorted coordinates
float r = texture2D(tDiffuse, vec2(waveUv.x, waveUv.y + uVelocity * 0.0005)).r;
vec2 gb = texture2D(tDiffuse, waveUv).gb;

gl_FragColor = vec4(r, gb, r);
This can create a delicate shade separation within the last picture that shifts based on our scroll velocity.
Lastly, we mix purple, inexperienced, blue, and alpha into the output shade.
8. Last Outcome
And there you could have it! We’ve created a responsive textual content scene, with scroll-triggered masks reveal animations and
wavy/rgb shifted post-processing.
This setup supplies a strong, modular basis for constructing extra superior WebGL textual content results. When you’re curious to discover additional, take into account including particles, fluid simulations, audio reactivity, or extra complicated supplies and shaders. When you’re inquisitive about breakdowns of any of those, be at liberty to attain out on X.
Thanks a lot for following alongside 🙌


